The work of Stu Maschwitz may be done, but he has left behind a trail of resources that most of the rest of us will need in order to get comfortable with these more demanding color ideas. And the development of ideas of linear color spaces in After Effects is a good example of why Adobe should continue to support additions and reviews of both internal and external resources within Adobe Help systems. AE Help is actually quite good in this regard, in itself and as a clearinghouse for other learning resources.
"Usability testing is important, but you've got other things to do. In this video, Steve Krug [author of Don't Make Me Think] ... talks about informal usability testing and how the minimum of work can give you extraordinary results."
fxguidetv #068 features part of an Adobe tech demo of nVidia acceleration of RED video files from an IBC 2009 recap from Amsterdam (along with news from davinci-Blackmagic, Eyeon, Avid, Nuke, etc).
The Adobe demos were at the nVidia booth showing technology using nVidia's CUDA architecture, and showed only what looked like filters in Premiere that accelerated playback of with multiple transform, blur, and color correction filters. Performance so far is playback up to 5 RED RAW clips with 8-12 filters.
We might be hearing more about this and more from nVidia's GPU Tecnology Conference starting today in San Jose. Among the interesting talks is a Keynote with Richard Kerris of Lucasfilm who is to "provide a glimpse of what’s on the horizon for GPU’s in future and how it will impact filmmaking."
The SF Cutters are meeting September 29at Adobe in San Francisco. The agenda includes a looks at: FCP 7 by FCS3 insider Kevin Monahan, Motion 4 3D by Mark Spencer, and RED Workflows by Kevan O'Brien of Adobe (Adobe Workflows -- no transcoding) and Torrey Loomis of Silverado Systems (RED Rocket). Light Refreshments will be served courtesy of Silverado Systems and SF Cutters. For more substantial food, there are eateries in the area and you are welcome to bring your own. SF Cutters Manager Claudia Crask ask that people please read the raffle list and look at special instructions for the meeting at Adobe on the Eventbrite signup page.
It's been a slow news month and many of the items were mentioned already, but Topher Welsh rounds up the missing After Effects tutorials in his latest survey, 43 Tasty Tutorials to Feed Your Mind! at AE Tuts.
One tutorial not mentioned here or there is Satya Meka's The Best Sound You’ll Ever See! (pictured). Satya doesn't use a 3rd party filter [edit: not Trapcode Form; see comments], and his technique has many options to learn how to create an attractive visual spectrum generated from audio.
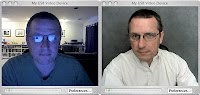
"Robert Sharp got into video in the early 1990’s as one of the founders of Terran Interactive – makers of Media Cleaner Pro. In 2007 Robert relaunched Digieffects – makers of Cinelook, and the more recent Camera Mapper plug-in. In this frank and open discussion Robert talks about the early days with Terran, founding Toolfarm, and what it took to bring Digieffects – an almost forgotten company – back from the dead. If you are interested in creating tutorials for Digieffects or beta-testing you’ll find contact details here."
One curiosity of interface design is that Media Cleaner Pro on the Mac was really well done, but unfortunately never imitated by video conversion applications that followed after its demise in a series of corporate buyouts.
"A quaternion Julia set is a four-dimensional equivalent of the standard two-dimensional fractal. By taking a 3D 'slice' through the 4D space it is possible to visualise a solid fractal."
There's much more detail on subblue, and also a Quartz Composer patch for the Mac OS and mention of OpenCL possibilities (already an implementation, via Satya) for future projects.
Red Giant posted a 3D motion graphics logo tutorial by Carl Larsen that "shows you how to create an array of 3D particles using Trapcode Form and Red Giant Plane Space to achieve a look that, under most circumstances, has been reserved for more complex 3D applications."
Digieffects has video tutorials for its new Camera Mapper AE filter, mentioned earlier in New AE filters Camera Mapper and Mojo. There's an intro, plus tutorials by Matt Silverman and Mark Christiansen. They also posted a short comparison with the Photoshop Extended to After Effects format Vanishing Point Exchange (AE Help has more).
Toolfarm later posted the latest one by Mark Christiansen:
Digieffects announced Camera Mapper, an After Effects filter developed in collaboration with Mark Christiansen that "allows you to simulate a 3D scene from 2D stills or footage. It allows you to isolate one or several objects in your footage, project these objects on a separate layer and pull that layer out of the background, creating the visual illusion of the object floating in front of the original footage."
Also, Red Giant announced Magic Bullet Mojo, a filter that acts like a magic button to give you a blockbuster-type film look "often use a subtle coloring effect to warm up actors’ skin tones while backgrounds and shadows get a cool blue treatment" (don't worry, there's a Warm slider to mix up the look). For background see the AEP post on a discussion of examples of Blockbuster Film Look and the Stu Maschwitz note.
Update: David Torno had comments on camera mapping (once championed by ex-ILMer Alex Lindsay for Electric Image) the AE-List, "The [Camera Mapper] plugin simplifies a method Andrew Kramer showed back in 2007... I wouldn't compare it to Photoshop vpe though. With vpe you create an actual connected 3d grid layout for the still image environment and panels are created and placed based on the grid.
The projection method allows the image to be projected onto any shape long as they fall within the projection bounds. They don't even have to be on the right plane. This can produce some interesting looks, where the background is warped by various solids. You still have to build the environment though.
Camera Projector would have been a better name. Since mapper implies that the image is stuck to the object. Obviously that is not the case as soon as you move any object in the scene."
AE Portal News will be on sabbatical for several weeks. By now the usual suspects are well known, and it's quite a gang compared to when this blog began during Macworld 2005.
Essential news on After Effects can be found on the region of interest blog by Adobe's Todd Kopriva.
The "new and improved" Adobe TV is now live in English, and it is faster. But the forced commercials are still there and it could be me, but many web videos seem to suffer from AV sync issues. And it's odd that there are no poster frames on embeds.
It seems if so many AE users are already into 3D apps, 3D won't get much attention from Adobe except maybe for Photoshop. As reported via Twitter 40% of After Effects users use Cinema 4D on a regular basis, 24% Maya, and 17% Autodesk Max -- while 24% use no 3D.
In Episode 29 of Red Giant TV, "Tim Clapham shows you how to use Trapcode Form to create some particle-based 3D text along with a cool transition on and off."
Also, Motionworks posted footage of a transitions built with Trapcode Form that used a Form tutorial by Aharon Rabinowitz as a guide.
The Genesis Project's Adobe Beginner Classes Episode #26 is available. It shows you how to create semi-realistic fog inside of After Effects. The clouds are created on 4 layers in Photoshop then animated in After Effects.
There are several essential techniques shown, and the final effect is easy to replicate. As usual there are several additional ways to do this effect. You can adjust the method by using a square image size in powers of 2 (512 or 1024 for example), so that the image is seamless when the Clouds filter creates the fill. Layers can then be used as a seamless tile for animation with the Offset filter in AE. Though spare, you can get away with only 3 layers (as seen in at least one 3rd party fog filter). Other additions should include a light touch of a favored distortion filter and/or 3D moves. Sebastian Sulinski showed how to create a seamless animation loop in another tutorial, Animated clouds effect with Photoshop and After Effects. Here's ABC Episode #26 (mentioned above) from AdobeTV:
A less archaic approach that may require more experimentation is just using the Fractal Noise filter in After Effects; for background, check out the resources in the AEP post Spare time for Fractal Noise.
Dean Velez also showed how to use Fractal Noise in the Total Training course Advanced Adobe After Effects 7 Pro. Here's a video excerpt if you want to sit through a commercial:
See also a few related implementations in tutorials by Video Colpilot, for example Smoke Screen (using puffs of smoke as particles) and Stabilize Shaky Footage.
A comment on John Nack's blog post Why your Web content will look darker on Snow Leopard explains the origin of the old Mac gamma. While the gamma change is hardly news to After Effects users, there's more in the post, like a quote by Adobe Principal Scientist Lars Borg, "the movie studios' Digital Cinema Initiative selected a gamma of 2.6 as providing the best perceptual quality for 12-bit cinema projection" now in home theater.
Ted Dillard (11:19 AM on September 4, 2009; trimmed here): '... I think I got it from as near the "horse's mouth" as you can- Bill Atkinson, who not only pioneered ColorSync, but built QuickDraw and helped develop the first laser printer for Apple.
The story he tells is that they were trying to get the Laserwriter to print close to what the screen was showing- in monochrome, mind you, and the only way they could get it to work was to jack the gamma to 1.8. In his words... "it was the silliest thing."
Color Management wasn't even a thought at the time, and it set the stage for decades of Color Management mismatch and confusion. I asked him about it because I read a story about gamma, and that, back in the mid-90s this team took a bunch of cards and tested them- Mac and PC, and they all tested out to around 2.1 - 2.2.'Fun maybe just for me, I resold a copy of Bill Atkinson's photography book Within the Stone to Aardvaark Books in San Francisco last year; it was inscribed by a Bill Atkinson to the Dalai Lama.
In the video below, Harry Frank and Aharon Rabinowitz go tag team for a tutorial in sound design, creating scary audio (backwards reverb) as heard in Poltergeist. Aharon covers how to create the effect using audio software, while Harry shows you how to recreate that effect in After Effects.
Whoops, no previews even low res, but there's links all around.
Motionworks interview Unplugged 6 features Andrew Kramer [later: part 2]:
"In just a few short years Video Copilot has skyrocketed to become the dominant force in visual fx and motion graphics training online, with it’s founder, Andrew Kramer, becoming an industry icon. In part 1 of this riveting interview Andrew discusses his fascinating journey from high school student to industry leader and what that has meant to Video Copilot and him personally."
Below is a recent TED Talk from Evan Grant, Making sound visible through cymatics. It's nice to see an old idea get some high profile exposure; Hans Jenny's '70s 2-volume book Cymatics had been hard to find, but was reprinted awhile back, and the film narrated by Jenny is now on DVD (pieces are on YouTube). Cymatic figures are more often called Chladni patterns, especially in acoustic and physics texts, and are used to study nodes and vibration in instruments like violins and tablas. Someday sound will be important in providing cues in visualizations.
Artbeats now has both parts of Eran Stern's "Energy Drink" tutorial, which "takes you step-by-step through designing a 3D object using Photoshop Extended, animating it in After Effects and adding a reflection." The second part shows how to add a particle explosion and a "pendulum" animation of text.
Unfortunately, original viral version of Ideocracy's Brawndo has ruined energy drinks for some people:
Ambient occlusion render passes are usually added to a comp with a Multiply composite mode, but Stefan Minning has found demand, features, and improved render speed enough to share another After Effects filter, Occlusionist.
The filter should be available in a few weeks when render times are "more on par with what After Effects users are comfortable with" (see Comment)
Here's a few words from Stefan (also the maker of the AE filter Normality):
"Ambient occlusion is an approximative global illumination method that checks to see whether any given point on a surface is occluded by other surfaces. ... It’s an incredibly useful tool to give your renders more depth and a more realistic appearance. ... The Occlusionist requires a depth and a normal pass to do its thing. Once you’ve gotten those rendered out of your 3D program of choice it’s pretty straightforward to create ambient occlusion effects: Apply the Occlusionist plug-in, calibrate your normal- and depth pass and there you go — clean (or noisy, as you wish) occlusion effects right in After Effects."
Paul Tuersley's script pt_Panorama (was makePanorama) appeared recently in Recreating a Lexus commercial and now appears in a Video Copilot demo project of an Oval Office. Actually Video Copilot recommended this script over a year ago; see 3D Panorama AE script. Anyway, you can see the weakness of this approach (when close to the AE camera) in the oval molding, but it's mostly likely easier than building a panorama in Photoshop and using a Distort filter in AE.
Alternatives by Russell Brown can be found in his tutorials for Photoshop CS4 Extended at The Russell Brown Show: Spherical Panorama (at AdobeTV) and Advanced Spherical Panorama Stitching Techniques.
The options have improved in Photoshop by CS5.5; see info in Help (1, 2) and various resources from Richard Harrington.
Also, AE Scripts released Edge blending, a solution by erLab to build up panoramic projections with 2 or more projectors. This script will create the necessary comps for you render and be able to create this using standard video projectors.
This short video 'provides a jump-start for using the vector-based Shape Layers that were introduced in After Effects CS3. It demonstrates how to create “parametric” and “path-based” shapes (using the Mask and Pen tools, respectively), setting the color for fill and stroke (including creating gradients), editing shapes, adding shape effects, and how multiple shape paths and groups interact within the same Shape Layer. This is one of our favorite recent additions to After Effects; if nothing else, you should reach for a Shape Layer whenever you used to create a solid - they’re much more flexible.'
Motionworks' sorta weekly tour of built-in AE filters continues with CC Time Blend FX with Brian Maffitt. This is nostalgia that still informs:
"CC Time Blend FX was originally published as part of the Final Effects plug-in set, but is now included in After Effects as one of the Cycore (CC) plug-ins. In his recent Unplugged interview, Total Training founder and After Effects legend Brian Maffitt discusses the Total FE (Final Effects) training series and how he used Time Blend FX to make realistic smoke and plasma [before Spawn's Violator]. It’s my privilege to tell you that Brian has given Motionworks permission to host the Time Blend FX tutorial. It’s over 10 years old (the After Effects was black and white back then) but is still amazingly useful. Special thanks to Carey Dissmore for transcoding from tape."
Chris & Trish Meyer have a similar series on Lynda.com, except it is running though filters by Effect category (as in the Effect Menu). Chad Perkins had a similar treatment in his Lynda.com 2008 series After Effects CS3 Effects.
 Vizworld has background on the ProLost post Passing the Linear Torch in its Resource of the Week 9/30/2009.


 Digieffects has


