October 31, 2010
Make a spiral with Trapcode Form
Peder Norrby shows you how to use Trapcode Form to make a spiral shape in Form Spiral - Quick Tutorial.
You can find other tutorials on Form at Red Giant, various news items on AEP, and some free spiril-ish presets at Mylenium.
'The Walking Dead' [fan] titles
xxxxxxxxxxxxxxxxxxxxxxxxxxxxxxxxxxxxxxxxxxxxxxxxxxxxxxxxxxxxxxxxxxxxxxxxxxxxxxxx
The Art of the Title Sequence chats with animator Daniel Kanemoto [on Vimeo] on the titles for a new AMC series (premiering tonight) in The Walking Dead – unofficial:

It's an unlikely topic for a cable channel known for Mad Men and Breaking Bad, but we're primed after recent views of the Dead Set and The Crazies (bad acid aka BZ).
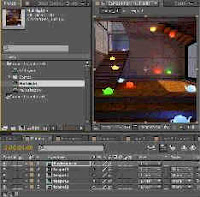
'Because I was working with static 2D artwork, I used various lightning effects to add depth to each scene. I created various mattes within After Effects to create a "Kodalith"-style glow to my light sources, which backlit most of my foreground elements. I also sandwiched layers of semi-transparent "mist" (usually just a white gradient) in-between every layer to help with the illusion of depth.After Effect project screenshot.
In addition to animating my 3D camera, I also created isolated effects to punctuate each shot. Blood spatter opens the sequence (these individual droplets started life as brushes in Photoshop, but were scaled up and retouched by hand for HD resolution), leaves drift across the screen, and there's a fly cameo. This buzzing insect was my homage to the clouds of flies that often surround the zombies in the comic, a horrible detail that always gives me the shivers.'
It's an unlikely topic for a cable channel known for Mad Men and Breaking Bad, but we're primed after recent views of the Dead Set and The Crazies (bad acid aka BZ).
Note: "Zombie Virus" Possible via Rabies-Flu Hybrid? gives some background on the new National Geographic Channel documentary The Truth Behind Zombies, which probably won't be an admiration of the Wade Davis school of Haitian zombies. Perhaps some Tea Party ethnobotany is in order, if Linnda Caporael and Mary Matosian are available.
Update: see also Film Riot Makes a Zombiemommy.
Update: see also Film Riot Makes a Zombiemommy.
3D Reflector & 3D Serpentine for After Effects CS5
 via @AdobeAE, Zaxwerks announces CS5 versions of 3D Reflector and 3D Serpentine plug-ins for After Effects.
 They also recently recently released 3 new 3D Reflector tutorials.
October 29, 2010
DSLR and 3D stereoscopic resources for Premiere
 As part of an effort to head off new users going to Apple or Avid, Adobe posted useful DSLR video and 3D stereoscopic resource pages for Premiere.
 The Adobe TV on DSLR shooting and editing has a range of useful basic info, which extends beyond to Richard Harrington's training initiatives. Essential resources not in the Adobe HDSLR list include resources like Prolost by Stu Maschwitz (pictured), Oliver Peters, and Camera Log from Adam Wilt.
Update: see also workflow guides for several high-end cameras and formats in Premiere Pro CS5 and After Effects CS5 from Todd Kopriva; it includes Canon DSLR.
October 28, 2010
Imitation is the sincerest form of competition

What is Windows but a continuing knockoff of the Mac OS? Apple itself has cannibalized its own hardware and software developers for many years. And would there be so many free After Effects tutorials exploding onto the scene several years ago without imitating and borrowing from the relatively expensive Total Training tapes and Creating Motion Graphics?
The big filter sets are all about being “me too!” by offering everything & the kitchen sink. That's often good enough if you don't have a big budget. Who knows, in trial evaluations buyers may find the GenArts Sapphire LensFlare as the tipping point over BorisFX, and forgo the extra expense of Knoll Light Factory at $399 or the even better Video Copilot Optical Flares at only $125.
Since they have the the advantage in quality, innovation and training, maybe Red Giant and others could make their keiretsus even more attractive by competing on price -- or just take the BMW route (which probably won't work for Automatic Duck). The whole issue makes me want another go at the Art of War, Code of the Samurai, and the Master of Demon Valley (in Thunder in the Sky: On the Acquisition and Exercise of Power by Thomas Cleary).
October 27, 2010
Video Copilot offers free stock elements

Video Copilot has a free download of 100MB of stock elements for Free Stock-Pack Appreciation Day:
"This random collection of 20 stock elements and textures range from a night at the Air Show, to a burning Fuse and some stunning Time-Lapse clouds. Not to mention a little payback! Well… actually, video clips of money from around the world."
Just a token, but it comes with less apprehension than those mysterious free stock DVDs everyone has been offering.
Update: Weynand Training shares notice of a 7-Day Free Trial to VideoBlocks.com, for download of 20 clips a day during with access to over 30,000 video clips, backgrounds, effects, etc.
And of course Artbeats has free clips, currently new weekly.
Sharpen Depth of Field with One Click [updated]
 If you missed them, Digieffect released tutorials for its Depth plug-in awhile back. According to Mark Christiansen, Depth, a filter found in the old Buena Depth Cue package, "does just what the name implies, easily extracting 3D depth data for use with Digieffects plug-ins such as Camera Mapper, Atmosphere and Falloff Lighting ... I especially like it for lens effects that can use depth information to create beautiful cinematic bokeh blurs."
For other approaches, tutorials, and tools check out previous posts tagged focus and AE camera. For example, Mathew Fuller covers techniques for extracting depth from 2D still images in his video tutorial Advanced 2.5D Animation in AE.
Here are a few tutorials for Depth:
Vangogh Depth+Camera Mapper Tutorial from digieffects on Vimeo.
Update: see these also,
Update: see these also,
- Projection is an AE script that does camera mapping onto 3D planes in AE
- Camera Projection – After Effects from VFX Bro
- Camera Mapping in After Effects from Andrew Devis (below):
Wohl on Final Cut & the future of editing

@idustrialrev (the plug-in maker) notes 2 old videos from YAKTV where original Final Cut team member Michael Wohl discusses the development of Final Cut and the future of editing:
It looks like Apple will need more of this because knee jerk reflex (this post included) about reports like Apple to delay FCP-8 till August 2011 “The writing is on the wall” (apparently referring to this). Meanwhile Adobe is running a full court press; see for example Is Premiere Pro outshining Final Cut Pro? and the Switch to Premiere Pro series from Chris Fenwick.
Update: Chris Fenwick's series is good, but does show the difficulties in switching between apps with only slightly different UI models; see comments to his video on mistakes in 3 Things Premiere Pro Can't Do.
October 26, 2010
Kinetic typography as storytelling

Type in motion is increasing popular, as seen in Kinetic typography as a storytelling technique a new survey by Lauren M. Rabaino at the journalism blog 10,000 Words...
Read the rest in Kinetic type in After Effects at Pro Video Coalition.
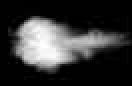
Volumetric smoke: Particular tutorial
Peder Norrby posted an After Effects tutorial and project on making Volumetric smoke with Trapcode Particular:
"After rendering the final clip I noticed I had to change the Particle>Size over Life curve so the particles size faded out rather than just disappearing abruptly. I also setup Aux>Opacity over Life so the auxiliary particles faded out (using opacity)."
"After rendering the final clip I noticed I had to change the Particle>Size over Life curve so the particles size faded out rather than just disappearing abruptly. I also setup Aux>Opacity over Life so the auxiliary particles faded out (using opacity)."
October 25, 2010
Maxwell Render buffer plug-in for After Effects
 Via @jonSpenceVFX, Maxwell Render Labs has an After Effects plug-in that allows users to import MXI files/sequences rendered in various popular apps, even SketchUp.
All MXI buffers are readable and 8, 16 and 32 bpc projects are supported, as is CS3, CS4, and CS5 on Windows and OS X.
FreeForm Pro, Shapeshifter AE & 3DNAE
Missed in the shuffle here but spotted in e-mail signature are more plug-ins from Mettle, creators of Digieffects FreeForm -- FreeForm Pro, Shapeshifter AE and 3DNAE. We heard about Shapeshifter AE earlier this year, so here's the sneak peak of 3DNAE for After Effects:
The importance of compositing for 3D
Greyscale Gorilla posted The Importance of Compositing: A Layer By Layer Breakdown in After Effects, with links, stills and videos not a shown here,
"In this video, I wanted to show you how important compositing is for your 3D renders. A 3D render is never finished straight from Cinema 4D or any 3D package. Every shot needs and deserves some sort of compositing and color correction before it’s ready for prime time... I will show you how Rich used After Effects, color correction, blurs, RSMB Motion Blur, Frischluft Lens Care and Lens Flares to turn his simple grey primitive 3D animation into a beautiful, atmosphere rich finished composite."
"In this video, I wanted to show you how important compositing is for your 3D renders. A 3D render is never finished straight from Cinema 4D or any 3D package. Every shot needs and deserves some sort of compositing and color correction before it’s ready for prime time... I will show you how Rich used After Effects, color correction, blurs, RSMB Motion Blur, Frischluft Lens Care and Lens Flares to turn his simple grey primitive 3D animation into a beautiful, atmosphere rich finished composite."
Scaling in Premiere Pro CS5

Todd Kopriva and Steve Hoeg share some details about scaling with CPU and CUDA in Premiere Pro CS5, which AE users can only look on with envy unless there's a Premiere render path through Dynamic Link or import. At least there's another option than Photoshop. Note also that deinterlacing and blending modes are GPU-accelerated, and there are GPU-accelerated effects [update: see a list in link comments]. Here's an excerpt on scaling:
- playback: bilinear
- paused: Gaussian low-pass sampled with bilinear
- high-quality export (Maximum Render Quality off): Gaussian low-pass sampled with bilinear
- Maximum Render Quality export: variable-radius bicubic (never used on unrendered footage)
The variable-radius bicubic scaling done on the CPU is very similar to the standard bicubic mode in Photoshop, though the Premiere Pro CS5 version is multi-threaded and optimized with some SSE instructions. Even with these optimizations, it is still extremely slow. For high-quality scaling at faster-than-real-time processing, you need to use a CUDA card.
When Premiere Pro CS5 is using CUDA on the GPU to accelerate the processing of scaling operations, it uses the following scaling methods:
- playback: bilinear
- paused: Lanczos 2 low-pass sampled with bicubic
- export: Lanczos 2 low-pass sampled with bicubic
For export, scaling with CUDA is always at maximum quality, regardless of quality settings. (This only applies to scaling done on the GPU.) Maximum Render Quality can still make a difference with CUDA-accelerated exports for any parts of the render that are processed on the CPU. Over time, we are working on reducing the list of exceptions to what can be processed on the GPU. For an example of a limitation that can cause some rendering to fall back to the CPU, see this article: “Maxium dimensions in Premiere Pro CS5″.
When rendering is done on the CPU with Maximum Render Quality enabled, processing is done in a linear color space (i.e., gamma = 1.0) at 32 bits per channel (bpc), which results in more realistic results, finer gradations in color, and better results for midtones. CUDA-accelerated processing is always performed in a 32-bpc linear color space. To have results match between CPU rendering and GPU rendering, enable Maximum Render Quality."
Read the rest at Premiere Pro work area.October 24, 2010
Tutorials taking you beyond the basics
 Todd Kopriva has a hyper-view of 2 recent tutorials by Andrew Devis mentioned in Using audio to control AE: 2 approaches in his post tutorials on using linear expression method, null control layers, and expression controls:
"... the real strength of these tutorials isn’t in the audio part of that instruction; it’s in the linking part.
Andrew shows very clearly and methodically how to use expressions (specifically the linear expression method), the expression pick whip, null object layers, expression control effects… all of which are immensely powerful and crucial features. Unfortunately, these same features are usually very intimidating for new users.
In other words, I think that Andrew may be selling himself short by saying that these are tutorials about something as easy to do as converting audio to keyframes. In fact, they are great resources for teaching some of the most important and universally useful features to help someone to move from the basics into doing seriously complex and advanced work in After Effects."
Read the rest, with the proper links, at After Effects region of interest.
Time-lapse and dynamic pans
Drew Geraci aka TheVoder.com posted Creating Dynamic Pans in your Timelapse (below via Lester Banks), which shows how to:
 See also Creating Timelapse Movies in After Effects, with an example by Ross Chang and a similar tutorial from Rich Harrington. [update: targeted more to Photoshop users is QuickHit #8: Creating Time-Lapse Movies in AE (Pt. 1) from Colortrails.]
Creating Dynamic Pans in your Timelapse from Andrew Geraci on Vimeo.
Update: see also Vimeo Video School's section on time-lapse and Combining Multiple DSLR Exposures in AE.
- batch process your images to save system resources
- create a dynamic link between Premiere and After Effects
- create a camera and null object within After Effects to apply to your time-lapse
- create a pan (or zoom) in your time-lapse
 See also Creating Timelapse Movies in After Effects, with an example by Ross Chang and a similar tutorial from Rich Harrington. [update: targeted more to Photoshop users is QuickHit #8: Creating Time-Lapse Movies in AE (Pt. 1) from Colortrails.]
By the way, After Effects has a filter called Color Stabilizer to fix flicker in time-lapse (see also the "auto effects"). Granite Bay has a nice guide on causes and cures to fix it, and a video on using their AE plug-in GBDeflicker. There's also GenArts Tinder DeFlicker which has about six ways to remove flicker to do multiple passes, but there's no CS5 version yet.
Here's Drew Geraci's tutorial:
Creating Dynamic Pans in your Timelapse from Andrew Geraci on Vimeo.
Update: see also Vimeo Video School's section on time-lapse and Combining Multiple DSLR Exposures in AE.
October 22, 2010
Delirium v2: reworked to 45 effects

 Delirium version 2 has been reworked from several previous Digieffects filter sets and now offers 45 effects spread across 6 categories. It'll be nice to get reacquainted with some old favorites that may have been lost in my reactions to frequent OS changes on the Macintosh. Some interesting stuff didn't make the cut, including the long lost TILT 3D Tools, which supported 3D object imports too far ahead of its time. The overview below shows only a glimpse of Delirium's potential [update: replaced by Delirium at work].
Upgrades and new features include:
- 64 bit compatible
- 32 bits per channel
- Added Walker Effects plug-ins
- Speed Optimizations
- New Textures
- New presets and project files
Delirium at Work from digieffects on Vimeo.
After Effects Rack Focus: tutorial and preset
Michael Eggert of PixelphileTV posted a tutorial and free preset in After Effects Rack Focus (via Lester Banks):
"We take a look at how to add a digital rack focus to any existing footage. This will add production value to shots that were made on video cameras that don't have a shallow depth of field. You will also learn how to make your own custom presets.
iRack 1.0 is a Rack Focus preset for After Effects CS3/CS4/CS5. With this preset you can add the look of a professional focus pull to any existing footage."
For similar tutorials and tools check out previous posts tagged focus, blur, and AE camera.
iRack 1.0 is a Rack Focus preset for After Effects CS3/CS4/CS5. With this preset you can add the look of a professional focus pull to any existing footage."
For similar tutorials and tools check out previous posts tagged focus, blur, and AE camera.
Note: Very different approaches include the use of Lens Blur (a Video Copilot tutorial is just one of many) and related filters like the Sapphire RackDefocus effect, which defocuses using an iris shape convolution to simulate a real camera defocus,
SF Cutters Oct *26: Boris FX, PBS doc, storage
 NOTE: since the SF Giants may be in the World Series, SF Cutters moved the meeting up a day to Tues October 26 -- same time, place, speakers.
xxxxxxxxxxxxxxxxxxxxxxxxxxxxxxxxxxx
SF Cutters -- brought to you originally by the Option key in Final Cut -- is having a meeting Wednesday Oct 26th.* This meeting is at the NINTH ST Screening Room at 145 9th St.
This meeting is not free (but there's a great raffle and pizza). Here's the current agenda:
- Larry Jordan demos Boris FX Contiuum Complete 7 FXPlug
- Paul Baker on PBS "Yellowstone" Doc - Prod to Post
- Chris Fenwick on Design an Affordable and Effective Storage System
- more + raffle
- Everyone who attends the meeting will receive a FREE Boris Continuum Glitters Unit plug-in via download (requires online registration for meeting, or using the link provided at the meeting on screen).
3-way Color Corrector in Premiere
October 21, 2010
Still-to-Still Morphs with RE:Flex
RE:Vision Effects posted a tutorial on using RE:Flex to do Still-to-Still Morphs (below).
Three somewhat similar tutorials were noted last month in More slow motion from pictures using Pixel Motion.
October 20, 2010
After Effects Leftovers: 40 tips better the next day
 Update: Todd Kopriva has outlined the series, adding links to Help pages for more detail.
Chris Zwar has a 5-part video series on PVC, After Effects Leftovers: Reheating old features you forgot you had, with 40 tips that look at often overlooked features. Three of the videos are up now.
October 19, 2010
Recording sound effects + free audio in Soundbooth
AEtuts and Creative Cow released some complementary tutorials in the last day. AEtuts and Audiotuts teamed to deliver Recording Action Movie Sound Effects Like A Pro – Audio Premium (previewed below), which show you how to produce your own Hollywood-style action movie sound effects with some grocery shopping.
Update: AE Freemart also noted Sound design for motion graphics by Jeff Earley.
Meanwhile, Andrew Devis posted Free Music & Sound FX in Soundbooth, which shows how to find and use the free music and sound fx in both CS4 & CS5 -- as well as a sneak peek at Sonicfire Pro 5.
Update: AE Freemart also noted Sound design for motion graphics by Jeff Earley.
Corner pin tracking magic
 Video Copilot has a new After Effect tutorial video and project, #112. Magic Tracking:
"In this exciting new tutorial we will go beyond basic tracking with a new Video Copilot preset for utilizing corner-pin tracking data. This new preset allows you to create dynamic Null Objects based on corner pin data from Mocha AE. It’s a simple solution to getting precise control over your tracking data and the tutorial shows you all you need to know. The explanation is more complicated than the process!
The preset interpolates a specific point based on your corner-pin data so you can attach elements to an infinite plane of a moving shot to fake depth and parallax; without 3D tracking."
You can find more info and other approaches to Corner Pin effect, tracking & resources, and mocha inside AE Help and via the post tags below.
Update: Andrew Kramer posted an add-on project, Magic Ball Tracking,
You can even download the project and see how I did the other effects as well but I encourage you to check the Magic Tracking tutorial to see how it works. There is no 3D tracking and it was all created within After Effects and tracked with Mocha."
Tagxedo: tag clouds with styles & stencils
Taking tag clouds a step beyond Wordle to tag clouds with styles & stencils is Tagxedo, which seems to have been done in Microsoft Silverlight (via jnack). You can add a custom stencil in the 2nd pass edit.

Update: Wordlings from Pete Warden seem similar at first glance, http://wordlin.gs/.
October 18, 2010
Mattrunks' 15 favorite mographs of 2010
French AE tutorial guy Mattrunks posted his 15 favorite mographs from 2010 in A summary of 3D, Motion Graphics & Design Titles. His tutorials look good if you speak French, or if you have the time to submit them to YouTube for translated subtitles.

October 17, 2010
Create the Harry Potter lumos effect
 Michael Park shows you how to create a Harry Potter "lumos" wand effect at Creative Cow. This effect seems popular on YouTube if you want to challenge Fred, but with the added bonus of tips on After Effects tracking, a zoom blurred Lens Flare, and homemade animated chroma hoop without 3rd party filters.
To turn the lumos off, you won't "need a miracle" or have to invoke a goddess of the night (Nox) -- just turn the eyeball off in After Effects.
Stock elements and AE tutorials
Rampant Media Design Tools has several After Effects tutorial videos, some supporting the use of their new motion graphics stock elements collections in an effort similar to Artbeats and Digital Juice. Topics include mocha tracking for roto in AE and how to control focus in AE 3D space using a basic expression:
'Monsters' and After Effects [updated]
 The latest fxpodcast from FXGuide is a broad discussion with Gareth Edwards about his film Monsters, with a few details on the use of AE:
"Like Atilla [which drew from for his Fxphd course], Edwards did all of the vfx and cgi work on Monsters in Adobe’s Creative Suite (including Premiere) and 3ds Max. The film included over 200 visual effects shots. He also served as director and DOP, shooting the movie with a Sony EX3 over several weeks in Central America and Mexico with a crew of four."
Edwards managed to put together the movie for thousands instead of millions (budget rumored $15,000 to the very low six-figures). Here's more from behind the scenes:
Update: Fxguide TV #97 has more coverage... and via @motiongfx Post has more too, see Director's Chair: Gareth Edwards - 'Monsters' by Randi Altman.
Update: Todd Kopriva catches us up on news on Monsters through December 2010 in recent Gareth Edwards work with Adobe software.
October 16, 2010
What’s a mortgage note? [OT]
 I don't have one and wondered, what’s a mortgage note? A union website via Generation Bubble has a clear explanation:
"A mortgage note is the document you signed when you purchased your home loan. Mortgages contain lots of paperwork – but only the original mortgage note with your signature is proof that you owe the debt. That’s why banks need the note to prove that they own the loan and can collect payments from you. The problem is, banks now buy and sell mortgages up and down Wall Street – slicing them up and repackaging them to sell to other banks. The bank you bought your mortgage from two years ago may not be the bank that owns it today. But, in all the shuffle, the mortgage notes often don’t get transferred along with your debt."
Maybe there'll be a return to dark age European legal procedure like trial by combat or trial by ordeal, methods prior to the development of common law by Crusader and Norman influence of Roman and Sicilian Islamic law (shariah law!).
There's more on the many irregularities around "Foreclosuregate" on The Dylan Ratigan Show (Oct 7, 13, 15, etc) and The Daily Show (1st segment Oct 7):
Update: on Oct 20 Democracy Now hosted Nobel Laureate economist Joseph Stiglitz, Foreclosure Moratorium, Government Stimulus Needed to Revive US Economy. Also, see What Happened to Change We Can Believe In? by Frank Rich.
Later on Salon, Andrew Leonard has much of What you need to know about the foreclosure mess: One side accuses banks and their robo-signers for fraud; the other blames deadbeat borrowers. Who's right?, plus Truthout features Foreclosuregate Explained: Big Banks on the Brink ... of bankruptcy.
AE FAQ videos by Todd Kopriva
 Video2Brain has a free series of AE video FAQs by Adobe's Todd Kopriva (aka "Clippy"), Adobe After Effects CS5: Frequently Asked Questions:
"In this free course, Todd Kopriva, co-author of Adobe After Effects CS5 Learn by Video, helps you avoid common After Effects hiccups with a collection of answers to Frequently Asked Questions. Whether you´re having audio hiccups, getting pixelated vector graphics, or getting oversized files or jerky playback, Todd equips you to zip past these common hurdles and get back to creating great effects."
If you're having performance issues in CS5, that FAQ is a good place to start looking for help.
This series is a prelude to a Video2Brain course by Todd and Angie Taylor due in November, After Effects CS5 Learn By Video, a book with video on AE fundamentals.
Update: the real Clippy was spotted at Conigs.
October 14, 2010
Using audio to control AE: 2 approaches
 Andrew Devis is on a roll with yet another tutorial -- this time it's a 2-part tutorial on Using Audio To Control Effects. It's a unique approach in that they do the same thing but with slightly different methods.
 Paraphrasing, the 1st part is the workmanlike approach, both slightly simpler and quicker, and ideal if you are only controlling a couple of items with your audio. Version 2 shows how to keep all the controllers on a single layer and is better suited for more complex projects with many layers, which need good organisation. The first tutorial is better if you are not experienced in using audio and expressions.
Noise reduction before color correction: MB Denoiser review
 Scott Simmons looks at Magic Bullet Suite 10’s new Denoiser plug-in at PVC. Among the details is to apply noise reduction before color correction, something recommended by Stu Maschwitz. There's also a generous link to a Cow tutorial by Michael Park, Grainy Footage Rescue using Magic Bullet Denoiser.
[update: see also a MB Denoiser review by Steve Douglas on Ken Stone's FCP]
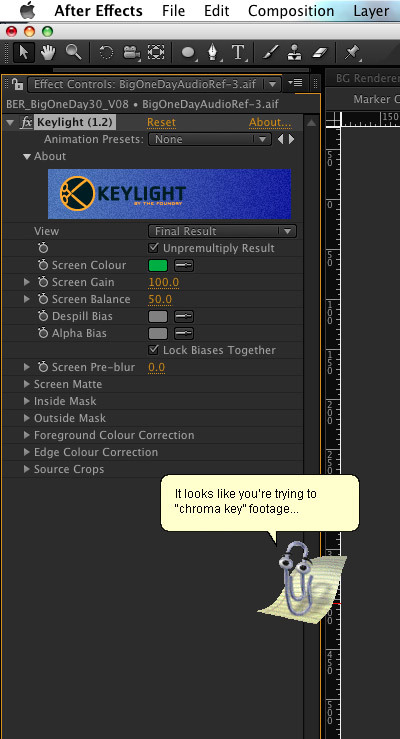
Update: There are a number of other noise filters available, like the Remove Grain effect built into After Effects (see video below by Matthew Borgatti), or DE:Noise, Neat Video (AdobeTV demo), Video Purifier and so forth. On the AE-list (Nov 20, 2010), Brian Behm commented on noise reduction for keying:
"I think you'll find there isn't a definitive answer out there because there's no definitive answer. When I'm keying footage shot on a T2i (fairly similar to the 7D video wise) I sometimes need to denoise and I sometimes don't.
In general though, when I do denoise it's early in the process before the key and then afterwards I'll go back and grain sample the original footage and add it back to my composited scene. Generally you're denoising as a way to assist in pulling a cleaner key so it makes sense that you'd do that before you pull the key."
Learn random expressions with earthquake tutorial
 On AEtuts started a series of After Effects tutorial videos on expressions with Felt Tips. The first, Shake It Up With An Expression Earth Quake (previewed below), is
"a basic look at the various random number methods in After Effects expressions. I go on to use some of these techniques to build an earthquake effect that you can easily adjust with a series of sliders. The tutorial is aimed at intermediate After Effects users who have some experience with the program and are looking to learn more about the power of expressions."
By the way, you can find other reviews of similar material by Chris Meyer, who recently posted on wiggle and random number methods. See also Random Numbers methods (expression reference) in AE Help for reference.
Felt Tips explains a bit more:
"This is not a tutorial about making some eye-candy effect. I’m well aware that you can build the same effect with a couple of keyframes and the wiggler. This is about setting up a simple effect with expressions to make a much more controllable animation, that is faster and easier to experiment and work with than the manual equivalent. There are very few good screencasts on the topic of expressions. This is the first in a series that attempts to fill that gap.
As with all series’ it starts simple, with some grounding principles. This is to make sure that it’s not just about copying and pasting someone else’s code, but gaining a thorough understanding of the process for yourself, so that in the future you can design your own complex expression systems. The next one will be building on that knowledge rather quickly. Very soon, you will be writing expressions to automate processes which would take you hours by hand – and shortly afterwards, doing things that can *only* be done with expressions."
October 13, 2010
Logo Distortion: displacement tutorial
 Eran Stern has a new After Effects tutorial video Logo Distortion:
"How to use displacement map techniques in After Effects to create distortion on a show open logo or looping background graphic."
Make CMYK color wheel tool in AE & Flash
AEtuts has an interesting looking premium tutorial by Dave Scotland, Creating a CMYK Color Wheel Tool – AE Premium. Here's the preview:
AE Studio Techniques for CS5 + scripts
 After Effects CS5 Visual Effects and Compositing Studio Techniques by Mark Christiansen is out.
 Studio Techniques takes a different approach from most AE books, not only by giving you 'just the facts' but by adding a task-based focus on visual effects. It complements the approaches in Creating Motion Graphics and other books, and adds 'divide and conquer' methods and practical tips to solve specific problems in After Effects. It'll be interesting to see what's new in this edition.
Update: one thing new is references to new scripts, see a list of the authors and scripts mentioned at AE Scripts.
Iced Up Text tutorial
Shortformvideo has a very quick texture tutorial with project file for After Effects in AE Tutorial – Iced Up Text:
Update: this tutorial might be a good starting point; Michael Szalapski and Ryan MacAfee provided other leads in a thread in July:
"This tutorial gives some color suggestions and ideas to have that frosty puff of cold air. It might point you in the right direction.
This one covers freezing a scene outdoors.
Both of them should give you some good tips, but you want just titles not working with footage so think about what makes you think of ice. Sparkling, blue, frosty...how can you get that in AE?
Well, this custom search turns up a lot including some free project files.
Also, I thought of this tutorial.
You could make it look like your titles are sitting on a reflective ice shelf.And this tutorial kinda looks like glass or ice."
"I have used this in the past with a logo.
Danny Winn also had some pointers,
"Under effects go to generate, choose "Cell Pattern". Then in the Cell Pattern effects settings there is a default setting called "Bubbles", drop that menu down and you'll have the crystals and crystalize option as well as a few more. You can tweek about all of that effect from size to movement. You can also go to the color correction effects to change the crystal colors. ... It might be a good idea to set your crystal layer to overlay (in the blending mode options), try a few to see what works best."
Also, the AE filter Alpha Ice Pattern aka Panopticon Ice Pattern is available for older versions of AE.
October 12, 2010
'The Social Network' conformed with After Effects +
 There's a video on the Adobe site with director David Fincher and crew talking about the use of Production Premium during post-production on his latest film, The Social Network. The film was edited in Final Cut and sent to Premiere via EDL for conforming with After Effects, echoing The DV Rebel's Guide (see also Prolost's What Should Adobe Do With Premiere Pro?).
There are a few additional details in The Social Network by Oliver Peters for Videography and in Editorial Friended by ‘The Social Network’ by Michael Goldman at The Motion Picture Editors Guild.
"The Social Network was shot on the Red One using the Mysterium-X chip set mostly at 4K 2:1 4096x2048 Redcode 42 and released as a 2K digital intermediate. Additional high-speed photography was shot 4K 2.169 4096x1888 at RedCode 36.
As lead data wrangler, Nelson first had the R3D files transcoded to ProRes 422 LT for offline editing in Final Cut Pro using the Red Rocket card and RocketCine-X. He used FileMaker Pro to keep track of all the footage, files and visual effects in a master database. He wrote a script in Filemaker that took the Final Cut Pro EDL and sent it through RedLine in Red Alert to generate mostly 2K DPX files from the original Red footage for visual effects and final conform.
The Social Network was conformed for digital intermediate in After Effects CS5. Nelson imported the DPX sequences as a multiple layered composition in After Effects and lined that up frame accurate to a QuickTime reference movie exported from the offline edit and imported into the layer above the DPX files.
“I used Premiere as a stepping stone to get my EDL from Final Cut talking to After Effects,” describes Nelson. “Because Premiere and After Effects talk to each other, I was able to bring an offline into Premiere and open that same file in After Effects. This made all of my edits in Final Cut Pro and my layers in After Effects match. The tool that I wrote is the secret behind having my DPX frames match up to my offline edit.”
The movie contains nearly 1,000 visual effects shots that were handled by Lola VFX, Savage Visual Effects, Outback Post, Eden FX and Ollin Studio VFX. Nelson provided mainly 2K DPX plates to the vendors depending on the quality of the image. There were some night scenes that were rendered at 4K and then processed by Lowry Digital for noise reduction and sharpening.
Having the final conform in After Effects enabled Nelson to do additional effects work. “So if anything needed to be painted, anything needed to be comped, additional repositioning, stabilization whatever needed to be done [we could do it].” At least 150 effects shots were done in-house using After Effects, SynthEyes and a plug-in called Immigration that was used to help auto relink offline layers to DPX image sequences."
Update: these seem like the movies, now on Adobe TV. There's also a PDF.
Update: THE SOCIAL NETWORK: Faces behind facebook by David Bordwell looks at emotion and expression in the story.
Subscribe to:
Posts (Atom)