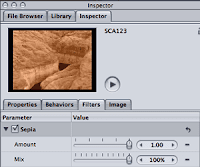
 Chris & Trish Meyer of Crish Design (cybmotion.com) have a short survey at Artbeats of the best effects in After Effects, Motion, and Final Cut to convert color footage to black & white, Grayscale Shootout. It's a somewhat fuller version of the note posted earlier on PVC, A Rose-Colored Tint, by Any Other Name.
Conversions like this have caused a lot of stress for Photoshop users in the past, as seen the long list of methods at Retouch Pro. Oddly, there's not many specifics from Photoshop Channel Chops (by the Calculations champion David Biedny et al) mentioned nowadays.
There are several ways to convert to grayscale in Photoshop, including using an individual RGB channel, the Lightness channel in Lab mode, a Channel Mixer Adjustment Layer, Hue/Saturation Adjustment Layers (use two and lower Saturation on to then adjust Hue on bottom), and so forth. Changing the mode to Grayscale (Image> Mode> Grayscale) in RGB uses a mix of 59% of the Green channel, 30% of the Red channel, and 11% of the Blue channel, while the Black and White Adjustment control does 40, 40, 20 and let's you refine the mix. Various aspects of this are discussed in an Adobe article, Choosing a preferred set of tones.
Russell Brown outlined the newer and apparently preferable Photoshop CS3/CS4 method of using the Black and White Adjustments in his movie Converting Color to Black-and-White. Martin Evening also has a video tutorial for conversion in Lightroom, though there's probably something newer.
Update: Richard Harrington has a related video on Adobe TV.
Update 2: Photoshop News has a tutorial in QuickTime, Advanced color to black and white conversion: "Using color channels as grayscale layers means you can use layer masks to alter the grayscale conversion and allows you to optimize for the best possible result. The technique allows shows how to re-convert your grayscale image back to a color image for the purposes of color toning."
Update 3: John Nack's Photoshop + Lightroom = Killer B&W from March 2008 has some extra info, including Kelly Castro's method for getting eyes to "pop:"
METHOD:
- Open a portrait image in Photoshop
- Choose Window > Layers (F7)
- Command + = (zoom in on the eyes)
- Shift + Command + N (new layer)
- Press X (switch foreground color to white)
- Press G (gradient tool)
- Open Gradient Picker in the Tool Options Bar and select "Foreground to Transparent"
- Select "Radial Gradient" in the Tool Options Bar
- Mode: Normal / Opacity: 100% / Reverse: unchecked / Dither & Transparency: checked
- Place your cursor over one of the subject's eyes
- Click in the center of the pupil and drag to the edge of the iris
- Repeat for second eye
- In the Layers palette, set the blending mode to "Overlay"
- Adjust the layer opacity to taste
- Command + E (flatten layers)
- Command + S (save)
RESULT:
A portrait with more impact.
Update 4: There's yet another tutorial for Lightroom; this one from PhotoshopCafe:
No comments:
Post a Comment