January 31, 2011

Optimizing for performance for Premiere Pro & After Effects

Adobe's Todd Kopriva posted the link to a recording of the recent webinar on optimizing for performance for Premiere Pro & After Effects.

Todd also provides addition links to relevant resources supporting this wide-ranging update to performance tweaking. He says "The most comprehensive place to find information on improving performance in After Effects is the Improving performance page in After Effects Help. Much of what is listed above can also be found there, plus much more."

Of particular interest for Final Cut users is this from AE Help:
RAM Reserved For Other Applications
Increase this value to leave more RAM available for the operating system and for applications other than After Effects and the application with which it shares a memory pool. (See Memory pool shared between After Effects, Premiere Pro, Encore, and Adobe Media Encoder.) If you know that you will be using a specific application along with After Effects, check its system requirements and set this value to at least the minimum amount of RAM required for that application. Because performance is best when adequate memory is left for the operating system, you can’t set this value below a minimum baseline value.

Note: Additional project considerations were discussed by Mark Christiansen in How to Optimize Projects in After Effects CS5.

Update: via @AdobeAE, not exactly related but good for reference is a thread on the Adobe Forums, What PC to build?.

ft-Toolbar: custom toolbar for After Effects

AE Scripts has released ft-Toolbar by Francois Tarlier. This script gives the ability to make your own custom toolbar in After Effects with effects, presets, or any commands you use the most often. At first glance it seems similar to Quick Fx Palette (a 'button bar' for effects and presets).

Toolbar’s features:

  • lets you edit the UI: add, delete, order, config buttons of your toolbar.
  • with 5 kind of buttons -- EFFECT, ANIMATION PRESET, SCRIPT LAUNCHER (.jsx or .jsxbin), MENU (for example, Time-Reverse Keyframes), JAVASCRIPT, and OS (command line, like launch a calculator)

There's a free trial of the full version of the script which is fully functional without a license for 2 weeks. Here's
a demo by Lloyd Alvarez:

January 30, 2011

Blending Modes: CMG Hidden Gems + more

Chris & Trish Meyer's series of tips, tricks, gotchas, factoids, and shortcuts continues with tips on layers in CMG Hidden Gems: Chapter 9 – Blending Modes.

This edition has a video tip on tinting with solids or gradients and modes.

There's other details on blending modes in AE Help: Work with layer blending modes and Exclude channels from blending, and via the AE team from Motionworks, Blend Modes on Collapsed Layers. And there's additional resources of course:


January 29, 2011

'After Effects Apprentice' translated to video

Chris and Trish Meyer are taking the lessons in their book After Effects Apprentice and recording them as a video training series at Lynda.com. If they're like the book, the lessons will be project-based and methodical yet gentle.

January 28, 2011

AE Scripts previews upcoming releases

AE Scripts posted a preview of its upcoming (and some recent) releases of AE scripts and plug-ins. The presentation was scheduled for the latest meetings of AENY and SFMograph...

AENY Jan 2011 Recorded Presentation from Aescripts+Aeplugins on Vimeo.

January 27, 2011

Fun in stereo 3D

It's been a fun few weeks for those following the saga of stereoscopic 3D. There's been:


Note: To keep things somewhat on topic, here links to Stereo 3D conversion tutorials for After Effects at AE Portal and The Art of Stereo conversion: 2D to 3D at Fxguide.

Stroke FX tutorial from Video Copilot

Andrew Kramer is back quickly with another tutorial using the built-in Vegas filter in After Effects, Stroke FX:
"on using multiple strokes to build high-impact graphics in After Effects. This relatively simple trick is a great way to make your titles pop and stand out. All of the strokes are dynamic so if you change the font or text, the graphics will update automatically. We also use the Vegas effect to add dotted lines and even Vegas lights. This is a lot of versatility in this technique so get creative!"

Colorista session with Prolost

Stu Maschwitz posted a color correcting session, Color Correcting Food with Colorista II. Stu says his "favorite bit is at 09:00 - about why colors blow out ugly on video and how to fix it."

Prolost has a bunch of tutorials and related posts, like Color Correcting Canon 7D Footage and Colorista II Tutorials (6 videos). Here's the session, which uses DV Rebel Tools script and more; there's more on Prolost:

Frozen in time, a free Particular project

Peder Norrby posted a free CS4 AEP of his Trapcode Particular experiment Frozen in time, which uses a Light Emitter driven by a wiggle expression, Aux particles trails that are frozen in time using a Physics Time Factor. Here's a render:

ExpressionTimeline: script to modify expressions

AE Scripts and Mamoworld now offer ExpressionTimeline, a new After Effects script that lets you combine and modify expressions without editing the code itself. This script makes it easier to:
  • make expressions be active only for a certain period of time
  • add more than one expression to a property
  • fade expressions in and out smoothly
  • transition smoothly from one expression to the next one
Here's a short demo and a tutorial for a peek (there's more on Mamoworld):


January 26, 2011

Unsecured IP security cameras

Mark Coleran noted Peep show: inside the world of unsecured IP security cameras by Tom Conno at Ars Technica (photo from William Lamson).

Live cams are almost as old as the Internet, so there's an active microculture and even live screensavers(eg, SurveillanceSaver for Mac OS and iPhone). It's not quite this era's found footage because of poor quality, but more hi-res frames could be tweened with After Effects. For related tutorials see Motion estimated morphing time-remapping on stills and More slow motion from pictures using Pixel Motion.

Here's an excerpt from Ars Technica's Peep Show and a video from digitalfxcube:
"Using the same basic technology that your computer uses, IP cameras take their own IP addresses and stream video directly onto a network without connecting to a DVR or control platform. Larger systems can integrate multiple IP cameras together using an NVR (network video recorder) that connects to and records multiple cameras at the same time. This capability can cut installation cost by literally thousands of dollars on sites where analog cameras would require long or complex cable runs.

Additionally, IP cameras frequently offer the additional benefits of higher resolution (with some models capable of 10 megapixels or more) and a more familiar platform for users to work with, meaning that they are also frequent favorites for smaller installations, too. Many forward-looking government, commercial, and even residential users are already standardizing their security on an entirely IP-based system, and most surveillance industry insiders feel this trend will continue into the foreseeable future."

5 Easy After Effects Expressions

Via FilmakerIQ is Top 5 Easy Adobe After Effects Expressions by Sean Bowers, the first episode of a “Fix it in Post” series from NextWaveDV (embedded below).

For something comparable, My 5 Favorite Expressions by Harry Frank comes to mind, as does an Andrew Devis video Hidden Templates & Powerful Expressions. There's more on expressions in AE Help, the piled-on post Expressions & Scripting Resources for After Effects and others at AE Portal, and in various video tutorials at AEtuts+, for example a 5-part series by Frederik Steinmetz, Introduction To Writing Scripts For AE.

January 25, 2011

A few TRON titles in After Effects

Andrew Kramer released his "Tron-Pilot" After Effects CS4 project file and a short video walk-through which describes creating the faux 3D text in AE (adding the Vegas filter for a volumetric effect) and building a few expressions. The project was previewed in December.

There's some other tutorials to mimic the TRON look, and some background on the VFX of TRON: Legacy from Fxguide (on face replacement effects), [update: Talking Tron with Digital Domain at Motionographer,] and in numerous "Making of" videos like those posted by Digital Domain. Here's a few more tutorials for After Effects, veering off with a few on neon:
  • In a TRON trailer the title text flickered. Motion Graphics Exchange has an expression from AEnhancers that creates a flickering effect similar to a flickering neon light.


But what if Saul Bass had done the titles for TRON?

January 23, 2011

Shatter plug-in tour from Total Training vault

Total Training is opening the vault to free some classic tutorials by Brian Maffitt with a comprehensive tour of the Shatter plug-in. Brian says that "Shatter has since been updated to use comp cameras as well. Everything else should still work fine!"

Additional info on Shatter [originally from Atomic Power] and related plug-ins can be found on AE Portal and Motionworks, see:

Here's Brian (the creator of Shatter) with a 45-minute intro; catch the other 5 parts on Youtube:

January 22, 2011

CMG Hidden Gems: Motion Blur +

Chris & Trish Meyer's series of tips, tricks, gotchas, factoids, and shortcuts continues with tips on layers in CMG Hidden Gems: Chapter 8 – Motion Blur and More.

There's other details and additional resources about motion blur in AE Help sections on Motion Blur, Timewarp, echo, and fields. See also Adding motion blur to video or 3D renders on AE Portal.


January 21, 2011

Kinetic Text Expressions for AE

Lester Banks notes an animation and expression on Vimeo by Danny D, Kinetic Text Expressions for AE (embedded below). Lester also points out a resource on another source on inertial bounce by Harry Frank (with downloadable presets), and by extension a thread on MoGraph.

Some related resources can be found at Motion Graphics Exchange and in recent posts here on presets and tutorials for gravity and bouncing (without the tweaks for rotation of course) . There's probably more on expression source AEnhancers. Here an example from Danny D:

Subblue's real time WebGL 3D fractal explorer

Subblue is featured in a recent article from Fast Company's Co.Design, Tom Beddard Grows Fractals Into Works of Art. He had been churning out free Pixel Bender filters intended for exploration and animation in After Effects CS4+. These free filters include the Droste Effect, Fractal Explorer, 4D fractal ray tracer, 3D Mandelbulb fractal, and Little Planets.

Co.Design, which has many more interesting articles, writes that Beddard is now working on:
"bringing his tools to the masses, putting the finishing touches on an open-source web application called ShaderLab which he plans to release within a few weeks. With ShaderLab, anyone will be able to generate 3-D fractal forms and interact with them in their web browser."
Here's a video generated [with a GLSL shader in AE, see comments] like you could produce with Beddard's real time WebGL 3D fractal explorer:

Colorista Free: in the works

Red Giant Software is planning to release Colorista Free, according to Stu Maschwitz on Twitter:

"Colorista Free won't have all the features of Colorista II of course, but it will do most of what Rebel CC does. CDL compliant."

For more info on other versions of the Colorista plug-in, see Red Giant, numerous posts on AE Portal, and especially Prolost on Colorista over NLE 3-way CC (what led to the creation of Colorista).

Sunburst or radial rays in After Effects


Update: See the newly updated roundup at ProVideo Coalition, Sunburst effect or radial rays in After Effects.
____________________________________________________________

AEtuts+ has a free project for Premium users by Tibor Miklos that contains 17 animations of a sunburst, aka radial rays.

Also, Brent Pierce notes The rise of the Sunburst! and some Photoshop brushes, Sunburst Brushes 2.0 by ~CreativeLiberties.

January 20, 2011

Lists of AE project effects, fonts, files +

After Effects Facebook posted a useful tip today: "Use Collect Files (Generate Report Only) to get a list of effects, fonts, & files used. ...the Collect Files command gathers copies of all of the files in a project or composition into a single location. Using this command is a useful step before rendering, for archiving, or for moving a project to a different computer system or user account." For more on Collect Files, see Kingsley in After Effects File Management Heaven or Hell?, and Carl Larsen on the collect and consolidate features in his video File Management in After Effects.

Chris Meyer followed Adobe's tip (likely from Todd Kopriva) with a comment that "the report might miss fonts loaded by an effect (for example, text generation effects where you get to select a font)." So Layer Marker notes might be good if the project is to be archived.

Lloyd Alvarez also noted ProjectInfoListExporter by David Torno on AE Scripts, if you want more customizable control over project information. By the way, David Torno welcomes requests for a script or an update idea for his existing scripts on his Facebook page.

January 19, 2011

Re-creating the 'Lost' smoke monster

Red Giant TV has a new tutorial and project by Seth Worley, Episode 52: Re-creating the Lost Smoke Monster. The tutorial features Trapcode Particular and 3D tracking with the Camera Tracker plug-in from The Foundry.


Update: BTW, @Oddernod posted some intro tips for Trapcode Particular on Twitter,
  • Been playing w Particular a TON lately - quick tips: work w lots of small particles (less than 3) at low opacity (less than 5%) set to ADD mode
  • use Glow Spheres as particle type, set to big size & feather values, & low opacity. Use motion blur set to subframe
  • crank shutter angle up & play w levels & opacity boost. Work in 32-bit Linear for some terrific glow blends
  • Study those Physics settings! Wire up a Expression Slider to Particles/sec to act as a multipler for working vs render values
  • Treat Particular like a 3D app's particle system: use Motion Preview mode to quickly design the movement, then design the look.

Are After Effects cameras difficult to use?

Referring to recent videos and a mini-roundup, Quba asks, Are After Effects cameras difficult to use?

He's got a short poll for feedback, with viewable results. Comments from Motion users and 3D artists might be interesting.

January 18, 2011

Camera difficulties and rigs in After Effects


Andrew Devis has 2 more tutorials, this time on some AE camera basics, Animating a Camera 1: Camera Difficulties and Animating a Camera 2: Simple Rig:

“Cameras are notoriously difficult to get to grips with in After Effects. In this tutorial, Andrew Devis explains some of the behaviors and problems that are common to camera animation and then shows how … to create a simple camera rig, and why it is important to get the order of the layers correct to achieve predictable results.”


Here's a few more resources on the AE camera:

There's much more in the AE Help page Adjust a 3D view or move a camera, light, or point of interest and in many AE Portal posts tagged AE camera.

Update: see also After Effects Camera "Target Object" Tutorial by David Biederbeck,

Hand drawn animation with After Effects paint tools

Angie Taylor has quick video tutorial available from Adobe After Effects CS5 Learn by Video (co-authored with Todd Kopriva), Hand drawn animation with After Effects paint tools:
"The paint tools in After Effects are usually used for cloning or filling in mattes, but they can also be used to create stop-motion-style animation. In this movie you’ll see how they can be used to create a stop-motion style without the need for painful frame-by-frame tweaking of keyframes or drawings."
For additional resources, see Paint tools: Brush, Clone Stamp, and Eraser in AE Help.

January 17, 2011

Pattern backgrounds in After Effects

In Pattern Backgrounds Inside After Effects, Brad Zimmerman shows how to create looping pattern backgrounds inside After Effects. He shows how to use a website like bgpatterns.com to create wallpaper elements to generate a pattern that can be repeated and controlled with the MotionTile and Offset effects. Also, tiling with CC RepeTile is discussed by Alan Shisko in Tiling Strategies In The 21st Century at PVC.

Project files and free background animations are posted on the Church Media Design (CMD) website. More on generating backgrounds, including a particle backgrounds tutorial from CMD, can be found in Looping backgrounds from CMD.

[update: Some Backgrounds in After Effects on AEtuts collects more of the tutorial on backgrounds from CMD. Laurence Grayson has several textured background quicktips videos; some were noted earlier in Carbon fibre+ brushed metal in After Effects. He has some free motion backgrounds.

Later, Colin Smith showed Creating Synthetic Backgrounds in Photoshop on Adobe TV.]

Here's the tutorial from Brad Zimmerman:

3D Bevel: script responds to AE light

Ben Rollason posted another 3D script for After Effects, 3D Bevel. Ben has 2 other 3D scripts, 3D Widgets and SkyDome, on AE Scripts and some tutorials on premultiplication and blending modes at Creative Cow.

3D Bevel combines the best of the built-in Bevel Alpha effect and the Bevel and Emboss layer style, and adds reaction to an an After Effects 3D light.

January 16, 2011

Cinema 4D Dynamics + Depth of Field

The influence of Cinema 4D in motion graphics continued to grow in 2010, and not just in making shiny balls. It's enough to spark interest in someone burned out on 3D from time in the Electric Image world.

Some Cinema 4D training resources were mentioned awhile back on AE Portal, and an attractive library of training is available from Tim Clapham. Tim's training can be found at Fxphd, Motionworks, and now HelloLuxx, where he recently released Cinema4D Dynamics Training.

News on the intersect between 3D and Affects Effects and compositing is often covered by Lester Banks, but there's a few new resources on Cinema 4D depth of field. As Quba Michalski notes, "Cinema 4D has a rather counter-intuitive method of producing depth of field. Both the camera controls and the way in which C4D handles depth maps can be a cause of major headache, especially for the newcomers to this program."

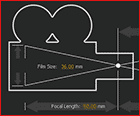
John Dickinson has created a new Cinema 4D DOF Quick Reference Guide, which "shows a top view of an actual Cinema 4D camera with extra visuals to help explain what the numbers in the Camera Depth Of Field dialog box are actually doing."

To simplify set-ups Quba has posted Cinema 4D Depth of Field Camera Rig, a 46-minute tutorial and preset, which also aims to help with "exporting both the 3D camera data and depth maps to After Effects (and potentially other compositing packages)." [Update: there's already an upgrade to Quba's C4D rig; see iDoF Camera Rig: Community Update 1.1.]

Here's the preview video, which seems similar to what Andrew Kramer showed using just Affects Effects in a tutorial that came with Optical Flares:

January 15, 2011

AE scripts to distribute layers in 3D space

Lost in the excitement over version 2 of BDRenderer was an update to DistributeLayers by nab Scripts (Charles Bordenave):

This script allows you to distribute the selected layers in 3D space. In addition to offset position, you can offset rotation/scale/opacity and adds some randomness. The “Factor” parameter allows non-linear offset between layers.
Some similar and not so similar 3D scripts from AE Scripts have been noted (eg, Trajectory, Multiplane, Matrix, 3D Layer Distributor, Create3DShapes), but DistributeLayers has not been mentioned here previously. Here's the demo:

Solar Panel Maker Moves Work to China

The New York Times reports on the invisible hand of the free market in Solar Panel Maker Moves Work to China:
"Aided by at least $43 million in assistance from the government of Massachusetts and an innovative solar energy technology, Evergreen Solar emerged in the last three years as the third-largest maker of solar panels in the United States.

But now the company is closing its main American factory, laying off the 800 workers by the end of March and shifting production to a joint venture with a Chinese company in central China. Evergreen cited the much higher government support available in China."
Read the rest at the NYT...

January 14, 2011

'12 days of VFXmas' continues

Freddie Wong and company are still posting their "12 days of VFXmas" videos on YouTube. Wong "exploded" onto the scene this year, which you might remember from such blog posts as Realistic Muzzle Flare Tutorial and Light Warfare + Behind the Scenes.

The 12 days of VFXmas are on freddiew's other channel on YouTube and on Facebook. Episodes look behind the scenes with a range of content, including how After Effects is used to create homegrown action scenes. So far they've
covered blood hits, greenscreen match lighting, track mattes, slow motion, blood splatters, background plates, rotoscoping, and more.

Here's the intro:


Update: Youtube interviews Freddie and partners,

Lip Sync in After Effects

Angie Taylor posted Lip Sync in After Effects, teaching a task that most animators will be asked to do at some point in their career.

Update: Lip Sync in After Effects: Some resources was updated and moved to ProVideo Coalition, It collects a few more lip sync video tutorials for After Effects. They're very similar in using time remapping, basic expressions or converting audio to keyframes, etc. and not CC Split, Reshape, or other.

January 13, 2011

An Animated Arrow To Rule Them All

An Animated Arrow (Tutorial) To Rule Them All is a new tutorial from Monologue, a motion design studio based in Athens, Greece now sharing tips in English and Greek. Below is an example render:


Note: There's a small fortune of other precious resources for creating and animating 2D and 3D arrows in After Effects, posted now at AEtuts.

January 12, 2011

Silk: an experiment in generative art + Tone Matrix

Jeff Almasol noted Silk, an experiment in animated generative art by Yuri Vishnevsky, a college student. It's simple but elegant, and headed to iOS. There are shortcuts for more functionality, like hitting the S or X key, or E, which generates a thumbnail of the picture which can then be saved as a PNG for compositing on black.

It's not so different from Flame Painter. Too bad that the open source AE Flame plug-in is stuck in CS4 (see Neosapien and Flam3); a JDI day for an AE script or Pixel Bender version of Silk would be cool though.

Silk is sort of the visual analogue of Tone Matrix by Andre Michelle (and by extension iNudge and various other time-sucks).

The Art of Stereo conversion: 2D to 3D

Fxguide has updated its "Art of" piece on stereo 3D with Art of Stereo conversion: 2D to 3D, by Mike Seymour. It looks at current post production issues, tools, some case studies, and adds a timeline of recent major 3D movies.

Art of Digital 3D Stereoscopic Film, an older article from 2008 is still available, along with others in the "Art of" VFX series noted here previously.

There's more in Stereoscopic conversion for After Effects using Mocha and other posts tagged Stereoscopic. You can get much deeper instruction in several dedicated classes on Fxphd.

RAM preview not necessarily WYSWYG

RAM previews in After Effects are not necessarily WYSWYG, even apart from OpenGL settings and usage, and this can be a difficult problem to unknot because of the number of settings and Preferences involved -- some of which are among the many things new in CS5.

As Todd Kopriva pointed out on the AE-List, guidance can be found in Preview modes and Viewer Quality preferences in AE Help:
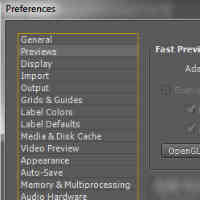
"In the Previews preferences category, you can choose the quality and speed of color management and zoom [Magnification, display scale, PAR] operations used in previews. From the Zoom Quality or Color Management Quality menu, choose Faster, More Accurate, or More Accurate Except For RAM Previews.

The More Accurate Except For RAM Previews option uses the more accurate operations for manual previews and standard previews, but uses the faster operations for RAM previews[emphasis added]"
As usual Creating Motion Graphics is also helpful. Chris and Trish Meyer recommend keeping Preferences > Previews to "More Accurate" unless you have an older computer. For more on OpenGL, which might be best turned off for the most part, see OpenGL basics in After Effects at AE Portal.

Pro Presets 2 for Optical Flares

Video Copilot has released Pro Presets 2 for Optical Flares, which includes 50 new presets, 10 After Effect template projects, 7 professional fonts, and 3 new video tutorials. And as you'd expect there's a nice video product tour and other demos.

For more on the Optical Flares plug-in and other lens flare news notes and tutorials, see Video Copilot Optical Flares in review and posts tagged Lens Flare at AE Portal.

January 11, 2011

Optimizing Performance for Production Premium CS5

Adobe has a live presentation & Q&A on Optimizing Performance for Production Premium CS5, scheduled on January 24, Noon PST. You have to sign up on Facebook for now.

If you can't wait for this, check out Setting Up After Effects for Optimum Performance on AE Portal, and this video Setting Up After Effects for Optimum Performance with 64-Bit Systems by Todd Kopriva from Adobe After Effects CS5: Learn by Video:

Tonight online: Boris Fx for After Effects

Motion+connect has a free live online event tonight, What's New in Boris Continuum Complete 7 AE. There's giveaways, and enough time to register.


Here's times and details:

time: 7:30 – 8:35 PM MST | 6:30 PST | 9:30 EST
url: http://motion.tv/connect
login to chat, comment, and participate in the Q&A

overview:
7:15-7:30 PM: Pre-Show: Winners of the 2010 Made with After Effects Competition
7:30-8:20 PM: Paul Ezzy: What’s New in Boris Continuum Complete 7 AE
8:20-8:30 PM: Q&A
8:30-8:35 PM: giveaways | close

SF Cutters Jan 11: Stereoscopic workflows

SF Cutters -- brought to you originally by the Option key in Final Cut -- is meeting TONIGHT, January 11, 2011 from 6:30 PM - 9:30 PM at Adobe in San Francisco.

Tickets available online until 7:00 pm. Here's the current agenda
:
  • filmmakers Renata and Marek Poray
  • Kevan O'Brien now at nVidia
  • Karl Soule of Adobe on Cineform : Adobe CS5 3D workflow
  • Prizes (NVIDIA QUADRO 4000 Graphics card - for MAC or PC, & more)
  • 6:30 - 7:00 come early have some Pizza and Drinks
  • Vendor tables (sponsors Adobe, AJA, NVIDIA and Create More; Snader, Propville Directory, Reel Directory)

BG Renderer 2.0: script standard updated

AE Scripts has just released BG Renderer 2.0, an After Effects script that allows you to render your Render Queue items in the background so you can continue working with After Effects. It runs as a dockable panel that is saved as part of your workspace. BG Renderer now comes in 2 flavors, Basic and Pro, and both versions now require a very low cost license.

After 4 years of compatibility updates, script author Lloyd Alvarez has completely re-programmed how it works, to make it even more easy-to-use and reliable. With the new Basic version you can just render your queue in the background with a click.

[update: Lloyd added more on the AE-List, "The basic version uses low priority to make sure you don't see any performance hits while you continue to work in the foreground. However if the machine is only rendering (ie you are not doing anything else) then the render speed will be the same as if the priority was set to high. What low means is that if there are other processes happening, the cpu will give priority to those over the BG render, but if there isn't anything else going on then the BG render will get full cpu priority."]

The Pro version offer many additional features, including:
  • set prefs for the renders
  • post render actions which allow you to get "growl" notifications
  • send email (with log), send sms and even iPhone push notifications when your renders are done or you have an error
  • send a terminal command to be executed after each item in the queue is done rendering and put the machine to sleep or shut it down
  • If you are using CS3 or CS4 and have CS5 installed, you can send your CS3 or CS4 render to the CS5 render engine to take advantage of the new 64-bit goodness while keeping your work project in the older version
  • a portable app/folder feature that makes it easy to create an ad-hoc render farm quickly by simply copying this portable app to all the machines on your network and just double-clicking it to launch the render on that machine.
There's full instructions on AE Scripts, with a video tutorial for each major feature.

For more information on background rendering and notifications, see After Effects render tips, Background rendering with After Effects and AE render notifications: iPhone & beyond at AE Portal.

Here's the overview video:

January 10, 2011

More After Effects tips

In 2009 Chris & Trish Meyer had another series of tips, tricks, gotchas, factoids, and shortcuts on PVC, similar to the current one called Hidden Gems (6 of those so far so far).

"The Shot You Can Make" simulations

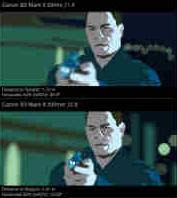
Stu Maschwitz is introducing a new Prolost "feature" designed to help you determine The Shot You Can Make, something needed because of the burgeoning options in new cameras. "It’s called the Shot You Can Make (SYCM) Simulator, and it’s sort of a 3D 'Marcie' for focal length and depth of field."

The simulator's "engine" seems to be the After Effects camera (controls and resources for it can be found in AE Help), souped up with some extras:

"Using a lens blur plug-in rigged with expressions, each 3D layer gets the correct amount of defocus for its distance from camera. The result is a simulation of the shot with accurate angle of view and depth of field."

Digital Film Tools releases PhotoCopy plug-in


Digital Film Tools has released a new plug-in, PhotoCopy for Adobe After Effects, Apple Final Cut Pro, Avid Editing Systems, Apple Aperture, Adobe Photoshop, Adobe Photoshop Elements, Adobe Photoshop Lightroom:

"We have analyzed the brightness, color, tone, detail, grain and texture of some of the world’s greatest movies, paintings, photographs and historical photographic processes. The DNA of these masterpieces can now be applied to your own images with PhotoCopy. The color, tone and brightness of the original work are replicated while the texture, grain and detail are simulated. If you have images that you would like to copy and apply their attributes to other images, just create, save and apply these custom presets to other images."

It looks like a combination of blend modes, texturizing, and displacement made easy.

Update: Marco Paolini adds, "Chatter won't be an issue in After Effects or any of the motion hosts. The grain randomizes and looks natural. Presets that contain texture are static and do not randomize."

January 9, 2011

Stereo 3D conversion tutorials for After Effects

Andrew Murchie noted new tutorials in the Enhanced Dimensions AE resource in New 2D to 3D After Effects Conversion Tutorials. He added Chris Heuer's Orlock the Vampire conversion with Mocha and AE, which won a Imagineer Systems' contest.

Chris also wrote a nice backgrounder, Nosferatu becomes Orlok the Vampire in 3D!, on the process for The Stereoscopic 3D issue of Creative COW Magazine.

For more of stereo 3D in After Effects and Premiere, see Stereoscopic 3D resources for After Effects and other AEP posts tagged Stereoscopic. Here's part 1 of Chris' tutorial from Vimeo: