Showing posts sorted by relevance for query colorista. Sort by date Show all posts

November 22, 2009

Colorista mini tips from 5tu

From the Stu Maschwitz Twitter stream, in response to a Photoshop user who asked, "where to begin to do Colorista type 3way L/G/G adjustments":

#Colorista tip 1: You can think of the three trackballs as a GUI for PS Levels. Lift is like in/out black, Gain is i/o white, gamma = gamma.

#Colorista tip 2: The stuff in The DV Rebel's Guide about push/pull grading with Rebel CC holds even more true with Colorista.

#Colorista tip 2b: Colorista in FCP compared Colorista with an NLE 3-way color corrector.

#Colorista tip 3: Watch this! ...


Red Giant TV Episode 22: Creating a Summer Blockbuster Film Look from Stu Maschwitz on Vimeo.

January 21, 2011

Colorista Free: in the works

Red Giant Software is planning to release Colorista Free, according to Stu Maschwitz on Twitter:

"Colorista Free won't have all the features of Colorista II of course, but it will do most of what Rebel CC does. CDL compliant."

For more info on other versions of the Colorista plug-in, see Red Giant, numerous posts on AE Portal, and especially Prolost on Colorista over NLE 3-way CC (what led to the creation of Colorista).

July 26, 2010

Colorista II multishot workflow with Stu Maschwitz

There a new video tutorial for Colorista II, Multishot Workflow With Magic Bullet Colorista II:

"In this tutorial, Stu Maschwitz shares a workfow for using Colorista II across multiple shots. He'll share techniques in creating a consistent look, highlighting your subject,and much more. Though he uses FCP in this video, these methods will work wherever you use Colorista II."

02 - Multishot Workflow With Magic Bullet Colorista II from Red Giant Software on Vimeo.

July 22, 2010

Colorista II: a significant upgrade [updated]

Colorista II is available now from Red Giant Software. It's a significant upgrade, and can be used in After Effects, Premiere Pro, and Final Cut (but not Avid or Motion). There's much more detail at RGS and Prolost; here's what's new and an intro video from Stu Maschwitz:
  • A powerful, easy-to-use keyer you to adjust individual colors or ranges of colors.
  • 8 HSL channels make it easy to get your crucial colors just right.
  • Use the new Pop slider to give your images more visual 'pop' or use it for incredible cosmetic touch-ups.
  • Highlight Recovery makes it easy to rebuild blown-out highlight detail.


Update
: there are already reviews,

Update 2: There's many interesting comments around the web (eg, one thread on Creative Cow with Walter Biscardi), and Stu has an addendum to his original post,

'Both Adobe Premiere Pro and Final Cut Pro bypass their own plug-in SDKs for their native 3-way color correctors. They use window configurations and graphics drawing routines that third-party developers don’t have access to. On some systems this can make UI interaction for third-party effects with Custom UIs slow. In the case of Premiere Pro, the slowness can be bad. Real bad.

Have you noticed that Premiere’s own 3-way color corrector has never been ported to After Effects? This is one consequence of the Premiere team’s choice not to use their own plug-in SDK. Another is that third parties cannot provide a fluid custom UI experience within Premiere Pro.

After Effects, on the other hand, “eats its own dog food,” and has no effects that don’t use the public SDK. This means that third parties can create excellent user experiences within After Effects. The benefits to us users are obvious — just look at all the amazing plug-ins available for After Effects.'


Note: See also the comment by Bob Currier of Synthetic Aperture at the Adobe Forums on "After Effects plug-ins versus using Color,"

'I'm biased as to what your choice should be, but one important thing to keep in mind is the basic difference in workflow between a dedicated color correction app like Apple Color, and a color correction plug-in like Color Finesse/Magic Bullet.

Color is designed to work similarly to a traditional tape-to-tape color correction workflow. That is, you complete your edit, lock it all down, then move on to color correction. Doing additional editing after color correction is difficult. The advantage is that you get to work in an environment dedicated to color correction, and the corrector "knows" about the entire project, making global operations easier. But the integration between the editing app (FCP) and the color corrector (Color) is limited.

With a plug-in, you do you color correction in your editor/motion graphics app so that revisions are easy to make, with no need to lock anything down or flatten the edit or effects. Integration between the app (AE/PPro) and the plug-in can be extremely tight. The disadvantage is that the plug-in is applied to individual clips/layers so that the plug-in only "knows" about that one item, making global operations more difficult.

We try to split the difference with Color Finesse, giving you an environment dedicated to color correction, while still being a plug-in. Of course, we also offer our standalone version for Mac users.

Neither approach is necessarily "better" than the other, they're just different. It largely depends on your own workflow preferences.'

For more on Color Finesse, see AE Help's "Resources for Synthetic Aperture Color Finesse."

February 8, 2009

Short primer video on Colorista and color correction

PrepShootPost has a short primer video on Colorista and color correction done for Red Giant Software when Colorista was released. He says "the ideas apply to FCP's 3 Way Color Corrector and pretty much all primary color correction tools out there on the desktop."

The rest of Eric's Colorista tutorials for FCP and AE are at Red Giant's tutorials section, and there's more at The Edit Blog and Prolost (which also has a side by side demo, pictured above).

It seems like it wouldn't take that much for Adobe and Apple to add the missing controls to their own filters, since Colorista's were probably inspired from higher-end tools themselves -- or they could just license the filter.

August 10, 2010

August 5, 2010

Skin Retouching in Colorista II with Stu Maschwitz

Red Giant posted the 5th tutorial in a series by Stu Maschwitz, Cosmetics: Skin Retouching with Magic Bullet Colorista II,

which "shows you how you can quickly and easily use Magic Bullet Colorista II for cosmetic skin retouching. You'll learn simple and effective techniques for subtly downplaying signs of age (such as wrinkles or skin blemishes), and giving pale skin a healthy color, without effecting other elements in your shot."


05 - Cosmetics: Skin Retouching with Magic Bullet Colorista II from Red Giant Software on Vimeo.


For more, see an earlier post "Correct" skin tones and others tagged skin.

Update: See also Quick Skin Tone tutorial in FCP:

March 30, 2011

DV Rebel Tools for free

Note: Red Giant released Colorista Free, which is pretty much Colorista 1.
~~~~~~~~~~~~~~~~~~~~~~~~~~~~~~~~~~~~~~~~~~~~~~~~~~
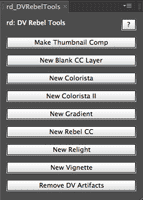
Prolost is celebrating the release of e-versions of The DV Rebel’s Guide (review) by giving away updated versions of the DV Rebel Tools scripts included with the original edition of the book. For many more details, see Rebel's Guide on your iPad or Kindle, DV Rebel Tools For Free.

Here's Stu's tutorial for DV Rebel Tools and a recent color correction session that also features their use (and still hoping for Colorista Free):


August 3, 2010

Power Masks in Colorista II with Stu Maschwitz

Working with Power Masks in Colorista II with Stu Maschwitz shows "Colorista II's Power Masks, with a focus on interaction between the masks as well as using motion tracking (in AE) to get convincing and consistent color correction."

04 - Working with Power Masks in Colorista II from Red Giant Software on Vimeo.

September 12, 2010

January 27, 2011

Colorista session with Prolost

Stu Maschwitz posted a color correcting session, Color Correcting Food with Colorista II. Stu says his "favorite bit is at 09:00 - about why colors blow out ugly on video and how to fix it."

Prolost has a bunch of tutorials and related posts, like Color Correcting Canon 7D Footage and Colorista II Tutorials (6 videos). Here's the session, which uses DV Rebel Tools script and more; there's more on Prolost:

August 26, 2010

Fxguide review of Colorista II

Fxguide posted an informative review of Colorista II by John Montgomery. Six recent tutorials and more can be found in recent AEP posts.


Update: Prep Shoot Post shows how a little Colorista II makes for GOOD LOOKING CINEMA - THE NEW DIY AESTHETIC.

July 29, 2010

The Keyer in Colorista II with Stu Maschwitz

The Keyer in Colorista II with Stu Maschwitz shows "tips and techniques for easily and quickly getting powerful results with the new keying and color correction tools."


December 19, 2006

Colorista license works in all apps both Mac and Win

Among the cool things about the new Colorista color correction filter from Stu Maschwitz and Red Giant is that you get to use it on all supported on both Mac and Windows. Very generous.

I still need to check to see if rumored features were included, like minimized luma range transition zones and a control to stop/ramp the "flash" of the blacks to blue when adding blue to shadows (like telecine colorists).

March 5, 2007

The DV Rebel's Guide reviewed

The DV Rebel's Guide: An All-Digital Approach to Making Killer Action Movies on the Cheap by Stu Maschwitz, cofounder and CTO of The Orphanage and a former member of ILM's Rebel Mac Unit, is unique among general filmmaking books in integrating guerilla plannning and production tips with specifics of post production practice, all the while keeping both eyes on production value. Stu makes no promises, but tries to help you go from a person with a camera and computer to a cinematic auteur by reminding you that attention to things like composition is real cheap. The main thrust of The DV Rebel's Guide is proposing and explaining a workflow for effects and finishing in high quality bit-depth in After Effects with the aid of instruction, templates, and script tools.

But The DV Rebel's Guide isn't just an extended advertisement for After Effects (online resoures) or Adobe Production Studio. The DV Rebel approach is based on reverse-engineering the least expensive way to get to your vision. About half the book is about planning and production, to help you think like Hitchcock with a computer, pre-editing your movie and only shooting what's needed. Using examples from movies on DVDs, Stu breaks down scenes to individual shots to help you keep in mind just how movie reality is created. Tips for preserving continuity in storyboards, aspects of memorable shots, and lighting are all discussed, as are many details of camera control, motion, and timing. Extras on the DVD include additional chapters or sections, usable template projects for gunfire and bullet hits, gun scopes, night vision, handcranked film, letterboxing matte, and a sample project for online finishing practice. There's also valuable scripts and animation presets for removing DV artifacts, color correction (Rebel CC is also available on Stu's blog Prolost), vignettes, relighting, gradients, and thumbnail comps (which assembles shots in tiles to compare color correction results between scenes). While the book's content is action-oriented, this stuff will be of great use even if you prefer P.T. Barnum over Jackie Chan.

Although Stu advocates an AE finishing workflow (see recent podcasts from Creative Cow, TWiT with Alex Lindsay, and Filmmaking Central), there's plenty for Final Cut users in The DV Rebel's Guide, especially if they need to be picky about output quality for high-end projects. Stu shows methods for preserving superwhite highlight detail in Final Cut, for example by reducing opacity of a clip over black slug (or according to the Meyers, with the Color Corrector 3-way Auto White Level switch. You can maintain high quality within FCP by enabling the high-precision YUV switch in FCP's Video Processing preference then rendering out to Apple Uncompressed 10 bit (though it is 4:2:2). Preserving luminance highlights in the 100-110 IRE range reserved for superwhites by the ITU-R 601 spec (236-255 range in 8-bit RGB) can be a confusing issue, so if you want more background read the in-depth explanations of the issues by Chris and Trish Meyer (luminance and AE whites parts 1+2), Adam Wilt (white clip and setup), and Graeme Nattress (FCP levels). Stu explains the issues in general terms: prosumer and other cameras can overshoot NTSC whites (even with the zebra filter on) and hardware, codecs, applications, and filters can clip or crush your luminance range, specifically when there's a conversion from YUV to RGB for image processing.

The DV Rebel's Guide makes no effort to alert you to which codec does what exactly, but you get actual solutions in the book and on the web. The issues around luminance and high quality processing go to the heart of the matter of production value and workflow because of tradeoffs between rendering time, disk space, and quality, and there's been a number of discussions of these issues on HD for Indies (QT luma woes and FCP workflow), on Prolost (IRE, NLE mastering, Colorista in FCP), and on the Rebel Cafe forum. Do you really need to work in 32-bit float space (for background see Jonas Hummelstrand's linkfest)? Do you need Automatic Duck to move between FCP or Avid and AE (no, but not easy by hand or even hacking XML)? Is hard drive space available for the orders of magnitude more required (see Jim Feeley's guide) to online in high bit depth? Do you have time to render all this? Can this be done in Shake, Motion/Motion+AE, Fusion, or Combustion instead?

While The DV Rebel's Guide offers a battle-tested workflow to online your finished cut, you can design your own mix of application workflow by cherry-picking from Stu's tips. This would especially apply to people working on projects for DVD - or if edit, color, and sound changes need to be reviewed at each iteration from a timeline. Even with Media Caching enabled and with Nucleo Pro, you can't preview in After Effects as well as you can in an NLE. There are also plenty of FCP filter options ready to help replicate Stu's methods for fixing DV artifacts, improving field handling, adding film looks and the like inside FCP: Nattress filters, Color Finesse, Grading Sweet, FieldsKit, and (not the least) Stu's own Magic Bullet and Colorista, etc.

No matter what app you do effects or finish in, it's good to keep in mind that blurs, motion, gradients, and color correction all look better rendered in 32-bit colorspace even when the final file is 8-bit (check out Stu's example of generating overbrights). Some of the hesitancy toward this somewhat futuristic workflow might be because of technical or budgetary uncertainty - or it could be we lack the discipline to lock down our edits! In any case the DV Rebel approach is an important step towards the integration of previsualization and effects into production itself.

See Stu Maschwitz talk about The DV Rebel's Guide at the Film Arts Foundation in San Francisco, Tuesday April 10, 2007 at 7-10:00 pm.

January 8, 2011

Demystifying color grading, with footage

Oliver Peters posted another set of color experiments in Demystifying Color Grading II. He shows how many different tools can be used to design interesting looks in Final Cut and Avid, and includes a ton of examples using native tools, Magic Bullet Looks, Magic Bullet Colorista II (see the recent review by LFHD), and filters from GenArts, Coremelt, BorisFX, and Noise Industries.


The cool thing is that you have access the the same source footage:

"As subject matter, I decided to play with the short film Convergence, filmed by UK Director Martin Scanlan and DoP Steve Lawes. This is one of the first video pieces produced with a pre-production model of the brand new Sony PMW-F3 camera. Scanlan was kind enough to post both the ungraded offline-edited version and the final color-graded version of Convergence on Vimeo. Further info is on their blog. They have graciously made the ungraded version available for download, so I pulled some examples from the 1920×1080 H264 file."

Oliver provides links to his other recent articles on color (see especially Color Correction Effects Demystified and Grading with Color Wheels); click the tag color to find AE Portal color-related notes.

November 3, 2010

2010 Toolfarm Users' Choice Plug-ins


Toolfarm announced the results of its 2010 users' choice Plug-in Awards:

  1. Trapcode Particular
  2. Video Copilot Optical Flares
  3. Video Copilot Twitch
  4. Red Giant Magic Bullet Looks
  5. Trapcode Shine
  6. The Foundry Keylight
  7. Trapcode Form
  8. Imagineer mocha for After Effects
  9. Trapcode 3D Stroke
  10. GenArts Sapphire
(Red Giant Colorista II gets an honorable mention)

October 17, 2007

Magic Bullet Looks ships

Red Giant Software is shipping Magic Bullet Looks, the highly anticipated color correction tool for Adobe, Apple, and Avid software. Magic Bullet Looks also includes Misfire and Magic Bullet LooksBuilder, a stand-alone application to pre-visualize looks anywhere. You can get MBL bundled in Magic Bullet Suite 2007, which includes Magic Bullet Looks, Magic Bullet 24p, Magic Bullet Colorista, and Instant HD for high-quality up-conversion.

This version of Looks really has to be seen, so check out the trial version and these videos and posts: Magic Bullet Looks Prolost post, Tour The Bullet (Prolost/Studio Daily), and Motionworks' Getting Started with Magic Bullet Looks.

Update: Stu says to look for a secret feature...

Update 2: Review: Magic Bullet "Looks" - Slick, Sexy, A Few Flaws

December 8, 2010

How to talk to a Colorist

Walter Biscardi noted How to talk to a Colorist by Alexis Van Hurkman, which discusses topics like these:
  • Brightness is Lightness
  • Contrast Is a Stretch
  • Saturation Is Intensity
  • Hue Is Just a Name
  • Cool and Warm Are Important Descriptions, Too
  • What, Exactly, Do You Want Me to Change?
If this piques your interest, check out @hurkman's other writings on Colorista II, DaVinci Resolve, etc and his recent book The Color Correction Handbook --which covers cross platform fundamentals, tips, and techniques covering the art and process of professional color correction for film, broadcast, or the web with Assimilate Scratch, FilmLight Baselight, Quantel Pablo, Iridas SpeedGrade, Apple Color, and the new version of DaVinci Resolve.