
Showing posts with label review. Show all posts
Showing posts with label review. Show all posts
July 10, 2013
Adobe Anywhere released
December 23, 2010
'VFX and Compositing Studio Techniques' review + giveaway
 After Effects CS5 Visual Effects and Compositing Studio Techniques was released in October and my review at AEtuts is just in time for Christmas returns.
Adam Everett Miller posted details on the book giveaway (just "Like" AEtuts on Facebook).
November 24, 2010
'Creating Motion Graphics' review + giveaway
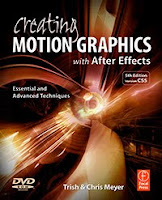
Creating Motion Graphics with After Effects CS5 was released in June and my review at AEtuts is just in time (for Black Friday).
@aetuts (Adam Everett Miller) says "Retweet, I'm gonna pick somebody to send a copy of the book to."

November 17, 2010
Cow reviews CameraTracker for After Effects
Bill O'Neil reviewed CameraTracker by The Foundry for Creative Cow. CameraTracker is a plug-in that "allows you to pull 3D motion tracks and matchmoves without having to leave AE. It analyses the source sequence and extracts the original camera's lens and motion parameters, allowing you to composite 2D or 3D elements correctly with reference to the camera used to film the shot."

O'Neil demos CameraTracker with several movie samples and screenshots and says:
"CameraTracker will also integrate with other comp camera effects such as Shatter; and third party effects such as Trapcode Particular, Lux and Stroke. The Foundry's last video tutorial explains this.
The Foundry's CameraTracker has a slight learning curve, but once you understand how it thinks, you will be on your way to pulling great tracks and match moves inside of AE. There are unlimited possibilities with this tool, including the creation of set extensions, projection mapping, and in-scene titles, to name a few." ... Read the rest at Creative Cow.
By the way The Foundry has 10 tutorials and docs for Camera Tracker, and lists other resources too, including a 3-part tutorial at AEtuts. For some other resources see Voodoo Camera Tracker: free matchmove alternative with AE.
"CameraTracker will also integrate with other comp camera effects such as Shatter; and third party effects such as Trapcode Particular, Lux and Stroke. The Foundry's last video tutorial explains this.
The Foundry's CameraTracker has a slight learning curve, but once you understand how it thinks, you will be on your way to pulling great tracks and match moves inside of AE. There are unlimited possibilities with this tool, including the creation of set extensions, projection mapping, and in-scene titles, to name a few." ... Read the rest at Creative Cow.
By the way The Foundry has 10 tutorials and docs for Camera Tracker, and lists other resources too, including a 3-part tutorial at AEtuts. For some other resources see Voodoo Camera Tracker: free matchmove alternative with AE.
November 10, 2010
'Color Correction for Video' review + giveaway
 AEtuts posted a Color Correction For Video “Thanksgivaway”! as well as by my review for this book, which is a serious overview of color grading for moving images by Steve Hullfish. The book is platform agnostic, using screenshots and examples from major applications and filters (including Color Finesse in After Effects), though favoring Apple Color. It also comes with 25 extra iPod-compatible tutorial movies.
A major strength of the book is real advice from professional colorists, which is taken even further in another Hullfish book, The Art and Technique of Digital Color Correction (2008).
May 24, 2010
Video Copilot Optical Flares in review
 [update: Toolfarm is having a Video Copilot Sale -- 30% on ALL Video Copilot products Wednesday and Thursday, May 26 & 27, 2010 only.]
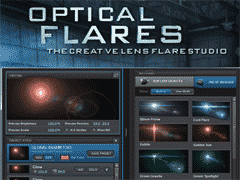
Video Copilot has released CS5 compatible versions of their After Effects filters -- free upgrades (OF, others, + update) from the previous versions. The standout among these is Optical Flares, a newer plug-in that leapfrogs longtime industry leader Knoll Lens Flare Pro in interface and features for about 1/3 the price. Here's a demo:
Andrew Kramer and company have taken a page from the Magic Bullet Looks approach to create a powerful and easy-to-use interface. The custom interface offers drawers full of visual presets and detailed control over individual flare elements, as well as a large adjustable preview of the composite or the flare alone. The advanced UI along with GPU acceleration allows users to build, edit, and manage unique and complex lens flares with speed and simplicity.
All of these features and more are built into this one plug-in:
- 3D lens flares with AE Lights
- 2D + 3D occlusion or obscuration
- edge flare-ups
- auto-tracking
- auto-animation
- textures
- matte box
Knoll Lens Flare Pro (which is not available for CS5 until summer 2010) has offered most of the same features with the addition of public beta releases, but without the integrated visual interface. Perhaps KLF's sole remaining advantage is that in addition to the main filters, 19 lens elements are also included for minute control over parameters, though you should be able to get similar control in Optical Flares using presets. For now, Optical Flares is an After Effects-only filter, but it is said that versions for NLEs, Photoshop, Fusion, and Nuke are under consideration.
 If you don't have a dedicated lens flare filter, and there are only two in this league, you're in for a treat. Overuse of lens flares is common though -- but with a filter like Optical Flares, you can rise above the common cliche of the Photoshop default (at left). Individual flare elements can be used as the base, as seen almost everywhere, or as elements of design.
Use in more realistic shots may take some extra observation and self-control. Tony Reale recently introduced ideas on using lens flares in edits in his After Effects tutorial Add Anamorphic Lens Flares to Video. There's a lot going on beyond the basics with lighting, camera filters and lenses, etc. and lens flares can become obsessions to avoid, create, or recreate. One good resource for study is a cache of QuickTime movies of real world lens flares by Claudio Miranda.
Another obvious resource is J.J. Abrams' "ridiculous" use of kinetic halos in the latest Star Trek movie (Andrew Kramer did the titles). See various discussions of these mostly in-camera effects done by cinematographer Dan Mindel in Where No DP Has Gone Before at ICG Magazine, and more about ILM custom matching "SunSpot" CG in Back on Trek (Flare Madness) at Millimeter & Star Trek Returns at Post Magazine.
 As a sort of an addendum, it's interesting to see how the idea grew for 3D lens flares in After Effects. From at least 2004, there were forum requests for help to go beyond parenting to a 3D layer. AE expression guru Dan Ebberts provided examples at MotionScript and explained a bit more about layer space transforms, which were also discussed by Chris Meyer not long ago at PVC. A few years later Mylenium's Building a Lensflare with Expressions (and Trent Armstrong's Making Light Disappear & Reappear Behind Objects Using Expressions) appeared at Creative Cow. Then in 2009, Andrew Kramer spread the idea further in Lens Flare on 3D Lights? and the race was on to incorporate 3D lens flares into an After Effects filter.
Update: Kevin McAuliffe wrote a substantive review of Optical Flares for ProVideo Coalition.
Update: Johan Romera shared Nuke2AE Optical Flares Gizmo, a Nuke script that corverts 3d data to 2d position to create AE keyframe data for Optical Flares.
April 11, 2010
Chris and Trish Meyer CS5 (p)review
Chris and Trish Meyer have a nice long illustrated (p)review of After Effects CS5 on PVC. The new embedded movies from AdobeTV will probably work better when the dust settles a bit.

October 3, 2009
PVC Review: Post-Production Management with ShotRunner
 Over on PVC, Mark Christiansen is profiling two online post-production management tool alternatives to manipulating Basecamp templates that are in beta and already used in production environments, Shotgun and ShotRunner. His first review is Online Post-Production Management with ShotRunner.
Those apps and a few alternatives were mentioned briefly here in May in Shotgun, Shotrunner + more production scheduling & collaboration. Introductory movies are available for most of these solutions aimed at review & approval and management.
May 5, 2009
Shotgun, Shotrunner + more production scheduling & collaboration
Here's a tour of a new web-based media production tracking and collaboration system called Shotgun. More info and links can be found via Final Cut User, which has a backlog of updates queued.
Another system recently twittered is Shotrunner, which has some QuickTime tutorials. The blog vfx.netzfilter posted some other options found in research Research on visual effects production databases and Random Links - Visual Effects Pipeline Design and Production Databases.
Update: VFX Nexus is another entrant in this niche. "It's specifically designed for tracking shots and enabling collaboration between artists and supervisors, allowing both a clear view of the status of their projects, shots and tasks at all times. This ideology - coupled with report creating, deep search abilities and customized views - is our version of Project Management." Here's a summary:
Update 2: There's a number of newer services that could branch into this niche too, even if they mostly do review and approval: Xprove, CineSync, FilmFlip, PIXSytem, MediaBatch, and MESoft. Let's hope someone does a proper roundup that compares these options and includes other software like Celtx.
Another system recently twittered is Shotrunner, which has some QuickTime tutorials. The blog vfx.netzfilter posted some other options found in research Research on visual effects production databases and Random Links - Visual Effects Pipeline Design and Production Databases.
Update: VFX Nexus is another entrant in this niche. "It's specifically designed for tracking shots and enabling collaboration between artists and supervisors, allowing both a clear view of the status of their projects, shots and tasks at all times. This ideology - coupled with report creating, deep search abilities and customized views - is our version of Project Management." Here's a summary:
Update 2: There's a number of newer services that could branch into this niche too, even if they mostly do review and approval: Xprove, CineSync, FilmFlip, PIXSytem, MediaBatch, and MESoft. Let's hope someone does a proper roundup that compares these options and includes other software like Celtx.
1 comments
 Labels:
approval,
collaboration,
filmmaking,
metadata,
review,
scriptwriting,
transcription
Labels:
approval,
collaboration,
filmmaking,
metadata,
review,
scriptwriting,
transcription
Labels:
approval,
collaboration,
filmmaking,
metadata,
review,
scriptwriting,
transcription
July 22, 2008
Real World Video Compression: book review
 Real World Video Compression is a new book from Peachpit Press that provides a handy comprehensive overview of trends, tools, and workflows for video compression today. Author Andy Beach starts the book with a look at audio, video, and compression basics that need to be known to independently deliver great video to the web, TV, and mobile and set-top devices. Current file formats, codecs, and players are surveyed nicely, with a concise but deep explanation of interframe and intraframe compression.
Before you get ahead of yourself Beach makes sure you keep in mind best practices for developing a workflow to deliver to a particular format. Optimal output requires good input, so Beach also devotes time explaining preprocessing steps, which include not only levels and color correction but also noise reduction, cropping, scaling, deinterlacing, and aspect ratio correction.
The last two thirds of the book surveys the strengths and weaknesses of a range of compression tools and details some recipes for producing content for various platforms. Many compression tools are mentioned at various points but 6 are given detailed treatment: Adobe Media Encoder (AME), Apple Compressor and QuickTime Pro, Microsoft Expression Encoder, Sorensen Squeeze, and Telestream Episode Pro. Since the book is well-organized, readers can quickly scan for the good, bad, and bottom line of each major application.
A unique feature of the book is interviews with professional compressionists, which are interspersed throughout. Along with bonus tips in these interviews you'll find tool preferences -- and that a surprising number of these professionals use low end apps like Visual Hub and MPEG Streamclip.
The last part of the book covers recipes for compression for DVD, the Web, and mobile (iPod and phones) and set-top devices. Valuable overviews of each niche are provided -- but rapidly evolving codecs, tools, and bandwidth capacities and a wide scope spreads content a bit thin in places. No one is giving away the store here, like providing information on data rate sweet spots in codecs or optimal parameters for VBR MPEG-4 encoding in mainstream apps. Well you do get details on encoding with x264 for the open source app Handbrake, which could with tweaking could help you push Flash H.264 to the limit. By the way there's also a QT/Mac version of x264 that you can use instead of Apple's version.
Also not deeply covered was optimizing for YouTube (a moving target), and more importantly analysis of which apps have better encoding implemented for which codecs or which custom codecs perform best. That's a tall order, though you can find pieces of the puzzle in anecdotal info on user forums like Creative Cow's Compression Techniques or in occasional articles like Jan Ozer's recent Cracking the H.264 Codec.
In all, Real World Video Compression is a comprehensive up-to-date view of video encoding, tools, and delivery platforms. A sample chapter, Preprocessing: How Real Movie Magic is Made, is at the Peachpit Press book page. Plus the author is offering extra specifics and updates through his blog, which is also called Real World Video Compression.
September 4, 2007
Client review of movies
 If you've got a project that you need to show to a few people, and only them, there are a number of ways to do this. A range of solutions, some free and private, were discussed in a previous post, Review and approval.
At the very least you can use streaming services like YouTube and make the videos private. But dedicated systems can have advantages. Xprove should be easy to use and they have a free plan to get you started on smaller projects. Another system is SyncVue Pro; if you have time see FreshDV's tutorial movie SyncVue Pro 2.0 New Feature Tutorial Pt. 1 and Studio Daily's Create a Reliable and High-Res Review Session with Skype and syncVUEpro.
September 3, 2007
BlipBack video comment widget
 Mashable has a story on BlipBack, a new video comment widget that lets you or your visitors record short video comments directly to your web page. Blipback also can receive video messages from cell phones, "so if you have a video enabled phone you can post directly to your widget while out and about or hand out the address to your friends and family and they can post to your page while they are out."
I can imagine several services for post production with modifications to services like this, or improvements to various review and approval solutions and planning systems like CeltX. A small market, high cost, and upload bandwidth are obstacles though. Then again since there are at least 9 Ways to Build Your Own Social Network each freelancer can tailor a network space to a range of purposes. Live video is easier now to implement and should soon be part of the mix.
Adobe's Bridge Home and purchase of Scene7 signals the importance of services. That's not quite as big as Google and Microsoft infrastructure-building moves but still interesting, and we have to wait a bit more before Adobe Media Player features and other services are announced.
August 23, 2007
Review: Trapcode Shine, Starglow, 3D Stroke filters
 I did a short review of the new-old Trapcode filters recently for SF Cutters.
In short, though similar filters (or Replicators or Behaviors) can be found in AE and Final Cut Studio, Trapcode Shine, Starglow, and 3D Stroke offer more control, unique features, and probably faster results than the alternatives.
Trapcode 3S: Shine, Starglow and 3D Stroke filters
Rich Young, July 2007
Trapcode recently introduced upgrades to Shine, Starglow and 3D Stroke filter products with Universal Binary/MacIntel support so you can use them inside Final Cut Pro 5.1+, Avid Express Pro 5.5+ or Premiere Pro, as well as After Effects 6.5+ and Motion 3. The Trapcode 3S Pack, which bundles these 3 filters at a lower price, is also available. The filters feature a new rendering engine to produce high quality images fast, with 32-bit support (After Effects, Final Cut Pro, Motion) and 16-bit support (Avid AVX, Premiere Pro). The same plug-in should work in AE and Premiere Pro on both Mac and Windows, but it's different than the FxPlug version designed for FCP and Motion.

Trapcode Shine is a 2D volumetric light effect plug-in which combines render speed, control, and high quality to simulate sun rays from behind text or logos, God rays through clouds or trees, or to create animated backgrounds. Other filters like Light Rays in FCP and Motion or CC Light Burst in AE (8-bit only bundled) can give you beautiful results, but you get more control and subtle results in a shorter time with Shine.
Shine includes numerous ray coloring options including 3- and 5-color gradients with 22 tweakable presets and unique controls to make light rays shimmer without animating the light source or layer position. Additional controls include pre-processed Threshold and Use Mask commands to control the luminance value or area where the effect begins. This in addition to a Transfer Mode controls to add original layer information, as well as separate Opacity controls for Source and rays, is much more powerful than a simple Mix slider, though you could get similar results with more time, layers, and/or built-in effects. And fast updates during parameter adjustments makes setup quicker. See an intro of Shine in action and additional example movies at the Trapcode site.
Trapcode 3D Stroke uses paths from masks to render volumetric strokes that can be manipulated in 3D space.You can bend strokes in space and taper controls to make strokes that are thinner at the ends, or fly around or write-on vector art in 3D (which will not disappear when viewed from the side). In addition there are 40 preset shapes for generating outlines or swirling strokes, built-in transfer modes, and motion blur for more realism. It has a built-in camera for Final Cut Pro and Motion but also works with AE comp cameras. See an intro of 3D Stroke in action and additional example movies at the Trapcode site.

Trapcode Starglow is a fast-rendering glow that uses highlight values of a source layer to create glints and star-shaped glows. The star shape consists of eight points that can be assigned individual color maps and streak lengths. The controls are similar to Shine, with numerous coloring options and presets, built-in transfer modes, and shimmer, threshold, and mask controls. To get a quick handle on this filter, see the Starglow Flash intro and additional example movies at the Trapcode site.
Summary
June 18, 2007
Review and approval
 Clients might don't always understand the importance of linking comments to movie times! Adobe's Clip Notes is useful for annotation of comments but people I know find QT Movie NoteTaker (Mac/Win) easier. It opens anything QuickTime can, and there's no need "doing window burns, waiting hours for renders, making DVDs, spending hours encoding, and then there’s the hassle of the review process -- having to continually hit pause on a DVD remote and write down the timecode you see on the screen."
If you just want to share a few files and use those annotations programs -- and don't have the budget for a service or webspace to store them -- you could also use file sharing services like Xdrive, SeeFile, and YouSendIt, although privacy terms may vary. It's also possible to make videos private at video sharing sites like YouTube.
There's a number of new services to do review and approval, among others tasks, including: Xprove, CineSync, FilmFlip, PIXSytem, MediaBatch, and MESoft. Studio Daily has a new short sketch about another system, pictured above: Create a Reliable and High-Res Review Session with Skype and syncVUEpro.
April 23, 2007
Xprove goes free, to a point
 Earth Day announcement: Xprove now offers free online video review and approval accounts.
Frank Capria: "We decided there were two ways to get the word out about Xprove. We could spend money on advertising and marketing, or we could spend that money upgrading our system to handle free accounts. We chose the latter. Now everyone can have a free Xprove account. It's limited to 100 MB (half hour of material with decent WMV 9 or H.264 compression) and a single project, but we think this will be useful to a lot of people with only occasional review and approval needs. The free account has no ads, no Xprove branding. It's completely professional looking. You can use it for real client work.
Everyone wins. Review and approval is now available for free to everyone. If Xprove can save a few thousand people a couple of car trips a month, we all benefit. We've also added some new features. Most notable is custom branding. Your Xprove site now looks like it's part of your web site. Now you too can have one of those fancy 'client log-in' links on your home page."
March 5, 2007
The DV Rebel's Guide reviewed
 The DV Rebel's Guide: An All-Digital Approach to Making Killer Action Movies on the Cheap by Stu Maschwitz, cofounder and CTO of The Orphanage and a former member of ILM's Rebel Mac Unit, is unique among general filmmaking books in integrating guerilla plannning and production tips with specifics of post production practice, all the while keeping both eyes on production value. Stu makes no promises, but tries to help you go from a person with a camera and computer to a cinematic auteur by reminding you that attention to things like composition is real cheap. The main thrust of The DV Rebel's Guide is proposing and explaining a workflow for effects and finishing in high quality bit-depth in After Effects with the aid of instruction, templates, and script tools.
But The DV Rebel's Guide isn't just an extended advertisement for After Effects (online resoures) or Adobe Production Studio. The DV Rebel approach is based on reverse-engineering the least expensive way to get to your vision. About half the book is about planning and production, to help you think like Hitchcock with a computer, pre-editing your movie and only shooting what's needed. Using examples from movies on DVDs, Stu breaks down scenes to individual shots to help you keep in mind just how movie reality is created. Tips for preserving continuity in storyboards, aspects of memorable shots, and lighting are all discussed, as are many details of camera control, motion, and timing. Extras on the DVD include additional chapters or sections, usable template projects for gunfire and bullet hits, gun scopes, night vision, handcranked film, letterboxing matte, and a sample project for online finishing practice. There's also valuable scripts and animation presets for removing DV artifacts, color correction (Rebel CC is also available on Stu's blog Prolost), vignettes, relighting, gradients, and thumbnail comps (which assembles shots in tiles to compare color correction results between scenes). While the book's content is action-oriented, this stuff will be of great use even if you prefer P.T. Barnum over Jackie Chan.
Although Stu advocates an AE finishing workflow (see recent podcasts from Creative Cow, TWiT with Alex Lindsay, and Filmmaking Central), there's plenty for Final Cut users in The DV Rebel's Guide, especially if they need to be picky about output quality for high-end projects. Stu shows methods for preserving superwhite highlight detail in Final Cut, for example by reducing opacity of a clip over black slug (or according to the Meyers, with the Color Corrector 3-way Auto White Level switch. You can maintain high quality within FCP by enabling the high-precision YUV switch in FCP's Video Processing preference then rendering out to Apple Uncompressed 10 bit (though it is 4:2:2). Preserving luminance highlights in the 100-110 IRE range reserved for superwhites by the ITU-R 601 spec (236-255 range in 8-bit RGB) can be a confusing issue, so if you want more background read the in-depth explanations of the issues by Chris and Trish Meyer (luminance and AE whites parts 1+2), Adam Wilt (white clip and setup), and Graeme Nattress (FCP levels). Stu explains the issues in general terms: prosumer and other cameras can overshoot NTSC whites (even with the zebra filter on) and hardware, codecs, applications, and filters can clip or crush your luminance range, specifically when there's a conversion from YUV to RGB for image processing.
The DV Rebel's Guide makes no effort to alert you to which codec does what exactly, but you get actual solutions in the book and on the web. The issues around luminance and high quality processing go to the heart of the matter of production value and workflow because of tradeoffs between rendering time, disk space, and quality, and there's been a number of discussions of these issues on HD for Indies (QT luma woes and FCP workflow), on Prolost (IRE, NLE mastering, Colorista in FCP), and on the Rebel Cafe forum. Do you really need to work in 32-bit float space (for background see Jonas Hummelstrand's linkfest)? Do you need Automatic Duck to move between FCP or Avid and AE (no, but not easy by hand or even hacking XML)? Is hard drive space available for the orders of magnitude more required (see Jim Feeley's guide) to online in high bit depth? Do you have time to render all this? Can this be done in Shake, Motion/Motion+AE, Fusion, or Combustion instead?
While The DV Rebel's Guide offers a battle-tested workflow to online your finished cut, you can design your own mix of application workflow by cherry-picking from Stu's tips. This would especially apply to people working on projects for DVD - or if edit, color, and sound changes need to be reviewed at each iteration from a timeline. Even with Media Caching enabled and with Nucleo Pro, you can't preview in After Effects as well as you can in an NLE. There are also plenty of FCP filter options ready to help replicate Stu's methods for fixing DV artifacts, improving field handling, adding film looks and the like inside FCP: Nattress filters, Color Finesse, Grading Sweet, FieldsKit, and (not the least) Stu's own Magic Bullet and Colorista, etc.
No matter what app you do effects or finish in, it's good to keep in mind that blurs, motion, gradients, and color correction all look better rendered in 32-bit colorspace even when the final file is 8-bit (check out Stu's example of generating overbrights). Some of the hesitancy toward this somewhat futuristic workflow might be because of technical or budgetary uncertainty - or it could be we lack the discipline to lock down our edits! In any case the DV Rebel approach is an important step towards the integration of previsualization and effects into production itself.
See Stu Maschwitz talk about The DV Rebel's Guide at the Film Arts Foundation in San Francisco, Tuesday April 10, 2007 at 7-10:00 pm.
July 2, 2006
SyncVue and Xprove: more client review
Other tools helpful in client review, in addition to previously mentioned QT Movie NoteTaker for Win/Mac and WordPress plugin Video Comments, are SyncVue and Xprove. Both solve the problem of the limits of e-mailing large files to clients, and provide some of the benefits of Adobe ClipNotes from PremierePro 2.
SyncVue (Windows version due soon) allows for collaborative reviews via a Skype peer-to-peer connection, while Xprove provides storage, alerts clients material is ready, and passes their comments to you.
Frank Capria (the president of Xprove) elaborates on the AE-List:
SyncVue (Windows version due soon) allows for collaborative reviews via a Skype peer-to-peer connection, while Xprove provides storage, alerts clients material is ready, and passes their comments to you.
Frank Capria
"The easiest thing if you want the media on your own server would be to setup a Wordpress blog for each client using the video comments plug-in mentioned below. It's all PHP/MySQL, so you can get under the hood and modify as you see fit.
Here's how it might work.
-- Each client gets a blog like clientname.yourdomain.com.
-- You can password protect the subdomain to keep prying eyes out.
-- Each client can subscribe to the RSS feed of their blog. Thus they get instant notification when you post something.
-- Using the Video Comment plug-in linked to below, they can comment on your clips.
-- Set up every user at the client site as an approved author, so comments don't have to be moderated.
It's a few more steps than Xprove, but if having everything on your own server is important to you, it would work. It all comes down to how much time you want to put into this. Both SyncVue and Xprove are pretty inexpensive and the infrastructure is someone else's problem."
June 21, 2006
Video Comments, a WordPress Plugin
via Frank Capria, a really interesting beginning to all sorts of uses:
Video Comments allows you to post video in your blog and allows comments to be made on it in-time. A popup window displays the video and commenting area; as a video is viewed the comments associated with a current video time will be displayed, viewers can also see all comments and jump to a specific point in time.
Video Comments allows you to post video in your blog and allows comments to be made on it in-time. A popup window displays the video and commenting area; as a video is viewed the comments associated with a current video time will be displayed, viewers can also see all comments and jump to a specific point in time.
Subscribe to:
Posts (Atom)