Eran Stern has a
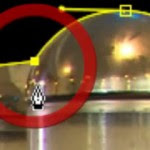
video tutorial and tips for using the Pen Tool from rotoscoping projects. For more tips and tricks check out the full tutorial through his website. Here’s some of his shortcuts
verbatim:
- Hold down CMD/CTRL as you draw your path, then select the anchor point, this will let you move the last point after you set it in place.
- If the selection tool (v) is highlighted, you can hold down ALT/Option and press on one of the anchor points and all the points in your mask will be selected.
- Clicking on an anchor point while holding down ALT/Option as long as the pen tool is highlighted, will convert it from Corner to Curve point. Another Click using the same modifier will change it back. If you want to do the same while the Selection tool is highlighted, just add the CMD/CTRL modifier as well.
- If you want to break the connection between the handles, hold down ALT/Option and then pull one of the handles out, make sure the pen tool is selected.
- Context-clicking on the mask shape with the Pen tool, enables the context menu of options for that mask, including all of its settings on the Timeline. One of the important things here is the Motion Blur settings for the mask, changing this value can unlocked the Motion Blur mask from the layer itself.
- Double-click on one of the anchor points to get the free transform for the entire mask – then it’s necessary to switch to the Selection tool to perform the transformation itself.
Also, check out previous AEP posts
2D morphing and
AE Apprentice #9: Shape Layers.
 Eran Stern has a video tutorial and tips for using the Pen Tool from rotoscoping projects. For more tips and tricks check out the full tutorial through his website. Here’s some of his shortcuts verbatim:
No comments:
Post a Comment