June 30, 2010

Screenfonts: movie typography + Making of a 'Hello Brooklyn' video

Motionworks tweeted about Screenfonts (from The Font Feed), a monthly commentary on the use of fonts in movie poster design, music video and more.

It's a welcome addition to other observed efforts, including various Topher Welsh roundups of motion type on AETuts, the Motion Design Love series Nice Type Tuesday, the Typography Gallery at Motionspire, and Type Tuesday by Brad Chmielewski. See also Four techniques for combining fonts + type videos.

In a recent post on a video made to a remix of Jay-Z’s Hello Brooklyn, Screenfonts author Yves Peters noted that beyond the background on the precursor to Helvetica:

"What’s really interesting is that the author of the music promo also posted a Making Of… video, showing how still images were treated with the Vanishing Point feature in Adobe Photoshop, and Adobe After Effects, to create the illusion of motion and depth. The end result is very impressive."


Making of "Hello Brooklyn" Video from Gregory Solenström on Vimeo.

Explaining Complex Concepts with Sophisticated Infographic Animations

Information Aesthetitics notes 2 instructive movies this week in Explaining Complex Concepts with Sophisticated Infographic Animations:

"
...watch The New York Times infographic animation How Mariano Rivera Dominates Hitters and learn about the differences between a 'fastball', a 'cutter' and a 'slider'. ...BP tries to inform the public about the technical details of its relief well drilling efforts, which also includes the exact video explanation BP uses internally for their own personnel currently present on their rigs. "

IA also posts favorite YouTube videos; here's one by Christobal Vila, who also did Ihsfahan (rig below), and shares tips and tutorials in Spanish on his work (Google Chrome translated automatically):


Isfahan Camera Rig from Cristóbal Vila on Vimeo.

Time-stretching and time-remapping

AE Facebook noted the After Help resource pages on Time-stretching and time-remapping; see also the Help pages on Timewarp and other Time effects. Andrew Kramer's 29. Speed Variation pretty much covers it in video.

You can also find a few extras from some old reliables: Freeze Frame with Time Remapping, a video by Aharon Rabinowitz; Animate Time, a PDF by Mark Christiansen; and Change of Pace, a PDF by Chris & Trish Meyer.

There's not much new except a few techniques (one using RE:Vision Twixtor plug-in) mentioned in recent posts Motion estimated morphing time-remapping on stills and Adding motion blur to video or 3D renders, and a slight tangent with Keying, Time Remapping, & Stills in Premiere CS5.

Freeform 3D displacement tutorial

Chris Heuer shows a bit of 3D displacement in Metal Man, a convenient 1st chunk of a 3-part tutorial on Digieffects Freeform, which shipped with After Effects CS5.

There's more news and tutorials on Freeform in previous AEP posts, and at Digieffects and Mettle. By the way, Digieffects on Facebook and Twitter said "Attn AE CS5 users - register your bundled copy of FreeForm and get Falloff Lighting for free!"


Metal Man 1/3 from digieffects on Vimeo.

OpenGL basics in After Effects

Stefan Surmabojov walks you through the basics and a render test in An Inside Look At OpenGL Within After Effects at AEtuts.

See also Render with OpenGL, Preview modes and Viewer Quality preferences, and other pages in AE Help on the web, as well as the list of supported graphics cards. There's a few more resources including video tutorials by Mylenium comparing Open GL features in AE 7 & 6.5, a demo for AE 7 by Steve Holmes and others in the major feature reviews at Total Training and Lynda.com. Unique factoids, like only the first 8 lights will render with OGL in AE, might only be found in Creating Motion Graphics by Trish and Chris Meyer.

Maybe Toolfarm will come up with a list of 3rd party plug-ins that support OpenGL or hardware acceleration, like the recent releases by GenArts. Anyway, here's Stefan's video (downloadable at AEtuts):

After Effects in face replacement for McVeigh doc

Mechanism Digital posted a press release about their use of face replacement in fictionalized "reenactments" (journalism itself can be a contradiction in terms) for an MSNBC documentary on Timothy McVeigh:

"On the set, Peacock shot thousands of high resolution photographs of recreated scenes, visual elements and a stand-in actor depicting McVeigh in action. Mechanism then built a CG 3D model of Timothy McVeigh’s face and replaced every frame of the actor’s face with it.

Mechanism’s unique approach to facial replacement had never been used in documentary filmmaking before which gave the compositor every possible frame of final rendered CGI in advance. In developing and refining this technique, multiple 3D models of McVeigh’s head were pre-rendered every two degrees of rotation on two axes. Two sequences of frames were a combination of 11 expressions and 11 eye positions. The number of images was then doubled by rendering two camera focal lengths to match the lenses used on set; totaling over half a million images and layers. These images were brought into After Effects with Mechanism’s custom expressions allowing the compositing artists to rotate McVeigh’s photo realistic head in real time within the program."

See also Todd Kopriva's Face replacement with mocha from David Torno on tutorials on how Torno did tracking, compositing, and other post-production work for a music video. The cmiVFX training Nuke Facial Replacement Techniques looks interesting too.

Here's a little "making of" for the McVeigh piece (the embed code is buggy, but there's a fullscreen option):


Update: Put Your Face Onto An Inanimate Object at AEtuts by Alexander Dohr shows simple "face replacement" done quickly.

And for an example of a different kind, check out this Spanish man, “Oscar,” the recipient of the first 100 percent face transplant. Previous transplants in France and the United States were only partial, but on the increase due to war wounds.

Update October 2010: Fxguide has info in Twice The Social Network,

"Lola are arguably the world's leaders in human face and body manipulation. In The Social Network Lola completed a hundred or so shots, but a key 20 of those involved delicate face replacement to allow one actor to play two roles - the Winklevoss twins. We spoke in-depth with Lola's VFX supervisor Edson Williams about the technical process."

June 29, 2010

Omino Stamp: Pixel Bender for stamping & repetition

David Van Brink has made access to his free Omino AE Plugins (CS5 for Mac; CS3-CS4 Mac/Win) easier and via @daleBradshaw has posted another new Pixel Bender filter, Omino Stamp:

'The idea is pretty simple: draw a “stamp image” in a pattern which can be affected by the source image. It’s a little bit like a particle effect, but more mechanical.'

Smoke particles text reveal

Video Copilot has a new tutorial, 107. Green Smoke, that uses smoke particles to reveal text. Andrew Kramer show some tips for randomizing the particles using Trapcode Particular and real smoke samples (something he favors in several of his tutorials, like 63. Smoke Screen).

Preference mod unlocks CS5 CUDA acceleration

Maltaannon notes an undated article by Studio 1 Productions, How to Unlock Adobe Premiere CS5 use almost any NVIDIA graphics card with CUDA acceleration.

Caveats on this unsupported modification and its origin on forums were discussed here in May in Preference mod widens CS5 CUDA acceleration. The new article above details additional tests with a wider range of Nvidia graphics cards and notes that power requirements may change with new cards. Having inexpensive hardware acceleration for a few layers with effects on DSLR footage has made some users pretty happy; conversation on the mod continues at the Adobe forums.

Update: there are some instructions for the same on the Mac at Insanely Mac in How To Cuda / Mercury Engine on Premiere CS5 / Snow Leopard [ lower end graphic cards ].

June 28, 2010

After Effects render tips

via @Lester Banks is another Felt Tips After Effects tutorial video on rendering. He previously posted Chain Rendering. Felt Tips comments that this tip is not exhaustive even at 27 minutes:

"There are no hard and fast rules, so this is a collection of some of my techniques that I've been using for the last 15 years or so using After Effects. It centres around setting up a render process early in a project, using image sequences until the very final stage. This has some surprising advantages.

I also cover the use of background renderer, creation of output modules and render settings templates, memory, multi-processing and disk-cache preferences, as well as showing a basic preset for rendering FLVs and Quicktime H.264 out of After Effects."

For more, click on the tags & see AE Help on Rendering and exporting. Here's the tutorial, and the introductory After Effects Apprentice Video Tutorial #10 by Chris and Trish Meyer from Focal Press.


Exporting from Premiere Pro CS5


via @AdobePremiere, Jeff Bellune shows how to export video from Premiere Pro CS5. He covers the important gotchas of Export Settings and the Adobe Media Encoder (AME) UI, except for dealing with source-output frame size changes.

Note that CUDA exceleration can make exports faster, for example when scaling, especially with a next generation card like the
GeForce 470. Encoding is not currently accelerated in hardware; the Elemental Encoder plug-in for Premiere wasn't developed for CS5.

Adobe TV has several other videos on exporting video & stills and on AME. Here's how to export just a still, which is a bit faster than exporting to AME:

June 26, 2010

What is YUV?: more on color space in Premiere

Karl Soule has followed up his look at color space processing in Premiere and the Premiere Pro Effects panel with What is YUV? Here's some flavor:

'When effects are used on a video frame, sometimes the effect needs to convert the values back to RGB before the effect can be applied. In 8-bit or 16-bit-per-channel color space, there can potentially be "rounding errors" when performing this calculation. This can mean situations where pixels that should pass through an effect unchanged will, in fact change in an unwanted way.

Effects in Premiere Pro that have the YUV logo do the processing directly on the YUV values without converting them to RGB first. At no point are the pixel values converted to RGB, and you won't see any unwanted color shifting.
32-bit color space has the color precision to convert cleanly from YUV to RGB, and will not cause any of these rounding errors. In Premiere Pro, all of the 32-bit effects are "safe" to use.'


Update: Karl continues his series with Color Subsampling, or What is 4:4:4 or 4:2:2?? See also DV Pix- Sampling Methods by Adam Wilt and Chroma Sampling: An Investigation by Graeme Nattress.

Update 2: Karl adds, "...in the engineering world, when discussing YUV color channels properly, there are two separate terms for analog color signals and digital colored signals. The term Y,Pb,Pr is referring to an analog signal, and I used it in a couple of my posts to describe a digital signal. The correct term for the digital signal is Y,Cb,Cr. Graeme Nattress from RED pointed out the mistake in the repost of this blog on Pro Video Coalition."


Update 3: Allan Tépper asks, Can editors and colorists finally scream: “Look Ma’, no professional i/o!”? in Does Premiere CS5 achieve the “impossible dream” for critical evaluation monitoring? at PVC.

Update 4: Adobe explains some stuff under the hood in this March 2011 thread, How does P Pro handle YUV (YCbCr) and RGB color spaces?

CG Swot interview with Todd Kopriva


CG Swot posted an MP4 of his June 23rd interview with Todd Kopriva, documentation lead for After Effects.

See also A history of After Effects from the AE Team, a video of a trip down memory lane with David Simons and Dan Wilk, both original CoSA After Effects team members, and current Adobe After Effects Engineering Manager Chris Prosser. And Motionworks posted a PDF on the story of CoSA by After Effects engineer Dave Simons, which was originally published in an edition of Creating Motion Graphics by Chris and Trish Meyer.

Audio waveform graphics in After Effects


Video Copilot posted a demo, project, and background on Audio Waveforms in AE.

There's more on the Audio Waveform and Audio Spectrum filters in Motionworks video quicktips by Maltaannon Effects A-Z: Audio Spectrum with Maltaannon and Effects A-Z: Audio Waveform, in a 2-part video tutorial by Aharon Rabinowitz, and by Chad Perkins on Lynda.com.

To extend the idea, see Sound Reacting 3D Waveform without 3rd Party Plugins and The Best Sound You’ll Ever See! by Satya Meka from AEtuts. Satya doesn't use a 3rd party filter (i.e., Trapcode Sound Keys), and his techniques present many options. Also, Sam Hampton-Smith wrote up his technique using the Wave World effect and the the CC Ball Action Twist Property in AFTER EFFECTS TUTORIAL: ANIMATE 3D WAVEFORMS USING AFTER EFFECTS.

Update: here's a fun animation, Reengineering the Esquire logo by Universal Everything (some reminiscent of Tim Clapham's Stylized 3D text with Trapcode Form),

Output module constraints in After Effects CS5

Tim Kurkoski and Todd Kopriva discuss Output module constraints in After Effects CS5:

'Now After Effects [CS5] knows the details of the constraints. When you choose an output module and change settings in the Output Module Settings dialog box, the settings are checked against this set of constraints. If there's a mismatch, a "Settings mismatch" alert and a yellow triangle icon appear at the bottom of the Output Module Settings dialog box. If you click the yellow triangle icon, a message explains what's going on...'

...
read the details at After Effects region of interest. Note that some constraints like frame size are instead seen immediately in Format Options.

Update: see also Tim Kurkoski's answer in Another question regarding CS5 format constraints.

June 25, 2010

Quick Tip on the After Effects Flowchart


Note: this post was moved to Pro Video Coalition as Flowchart tools in After Effects: Tab is the new Shift.
~~~~~~~~~~~~~~~~~~~~~~~~~~~~~~~~~~~~~~ 


John Kostrzewski's Quick Tip on the After Effects Flowchart at Fuel Your Motionography [RIP] illustrated how to use the Flowchart Panel. Many ignore this window since it did not actually herald nodes in AE, but it can be useful if you need an overview of your project's organization.

June 23, 2010

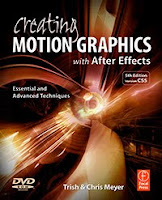
Creating Motion Graphics with After Effects CS5

Chris Meyer announced Creating Motion Graphics with After Effects, Fifth Edition for CS5 today on the AE-List. If your browser tab is too narrow you may have missed the chapter excerpts pointed out by Todd Kopriva, who broadcasts a hearty recommendation.

Trish and Chris Meyer are among the very earliest users and teachers of After Effects and have redesigned the book to reflect new features from both CS4 and CS5. This is the definitive book on After Effects and an essential reference for all but a few. It now includes sections on:
  • Mastering animation through the use of keyframes, motion paths, and the Graph Editor
  • Blending imagery using alpha channels, masks, mattes, modes, and stencils
  • Building groups and hierarchies through parenting and nested compositions
  • Extended coverage of type animation, paint tools and 3D space
  • New CS5 features including Roto Brush, mocha v2 for AE, and the Digieffects Freeform
  • Advanced subjects such as keying, motion tracking, mocha, expressions, integrating with 3D applications, and video issues
  • Extensive coverage of recently added features such as Shape and Puppet tools, Per-character 3D text, Brainstorm, Cartoon effect, color management, and more
  • The DVD also includes almost 200 pages of additional information, including lengthy Bonus Chapters on Expressions and Effects.

Nice Rack Focus Experiment


Andrew Kramer added a nice tutorial tidbit, Nice Rack Focus Experiment:

"In a recent tutorial Animating a Still, we used tracking data from a real hand-held camera to give our still image a natural look, as opposed to using a mathematical expression like the wiggle. This gave our footage a natural organic look that would be difficult to achieve with expressions.

Then I thought I would try a similar experiment utilizing a real optical rack focus. So I filmed a dark square while performing a real rack focus to see if I could extract the information inside of after effects to use with a 3D camera."

The Video Copilot community offered several alternatives in Comments to Andrew's post. Also, Maltaannon tweeted that it would be simpler with his CE PixelSampler -- if you have the time to install and explore it. Maltaannon leverages the sampleImage expression;
it doesn't give you the read out on the screen, but it does return the color value, so you can link it to a text layer.

[update: on the AE-List David Torno explains why there may be problems with "Custom Effects" in CS5, "Maltaannon builds his Custom Effects usually involves a psuedo plugin via the "preseteffects.xml" file, like how I did my Handheld Camera script. I found out when trying to update my script that Adobe changed how those plugins are referenced in CS5. So the code syntax needs to be updated. I gave him a heads up when I found this, not sure if he's seen that yet or not though. It is fixable manually if you feel like diving into the code, but it's not for the faint of heart. "]

For more on
sampleImage, see posts by Dan Ebberts, by Todd Kopriva, sampleImage() is fun and More fun with sampleImage(): Ascii animation in After Effects from Creative Workflow Hacks, and info in Creating Motion Graphics (4th edition, Bonus Chapter 35B, page 48 under Sampling Colors; in CMG 5, it's in chapter 37B, page 49).

Update: for more on rack focus and blurs, see After Effects Rack Focus: tutorial and preset, and other posts tagged focus and blur.

June 21, 2010

VFX Sweatshops + Spec Work

Talk about troubles in the VFX industry has continued since FX industry troubles: Lee Stranahan, Scott Ross + editing. Motionographer posted a rundown on the flurry of activity since then in VFX Townhall Recap and Links, and there's a bit more in AEP's VFX TownHall leftovers.

Scott Squires has been tracking the issue and recently noted the article on Hollywood's VFX sweatshops in Time
magazine and offers advice for directors and producers in Visual effects service - The Big Picture and Getting the most out of your VFX budget. His latest note is on The Tragic Plight of Hollywood VFX Sweatshops at the blog Sinisthesia.

Also of note is The Indian Exodus by Steve Wright (who helps with outsourcing), from an interview by Stranahan at VFX Filmmaker. Here's an excerpt:

'There is much concern in the VFX industry about our jobs being outsourced to India, and even China [which bans unapproved reincarnation]. Indeed, India is rapidly booting up a visual effects industry and has a vast pool of low cost artists to staff it with. Since I have been to India five times to conduct VFX training (the most recent being a two-month visit to two different facilities) I am often asked about the “lay of the land” there. While India has much potential, they do have some systemic problems to overcome.
[...]
So what does all this mean to the worried domestic VFX artist? If I were a junior artist with only roto or paint skill I would be worried. The lower the skill and artistic requirements for a job the more vulnerable it will be to taking the exodus to India. To keep our well-paying domestic jobs we will need to continually upgrade our technical and artistic skills. Don’t just be a compositor. Be a lighter-compositor. Be the “shot finisher” with superb color correction skills. Get into stereo. Take some art classes and have an artistic hobby to show a potential employer. Bottom line - the higher up the VFX food chain you are the more secure your job is.'

Update: Grayscale Gorilla has some things to say in his post and video, Why the NO SPEC Movement Isn’t Working. And, Why That’s so Awesome!

Why the NOSPEC Movement isn't Working from Nick Campbell on Vimeo.


CS5 Help options

Todd Kopriva has reminded us how to avoid the Community Help Client application if we're having problems. Adobe does have a nice range of Help via the web, PDF, and the Community Help Client AIR app. But some have found it difficult to switch between uses (for example if in an off-web editing room) or have problems with the newish Community Help Client, aka Adobe Help or Adobe Community Help (the latter term is also the name of the Adobe Support web portal). Others mourn the loss of a Table of Contents bar in favor of the breadcrumb navigation of CS5 Help (the addition of Help commenting can't really be the reason), or find that the one-at-a-time adding of apps to the client plus Exits are a bit cumbersome.

To switch between using a web browser and the Adobe Community Help, in the client select Edit > Preferences > Accessibility Mode. You can also update the client then take it back offline, and there's more options for mass control for network IT types. For more on the client, see the Adobe blog The Insider, and give feedback at the Community Help Application forum (the app itself uses 2 other names on your hard drive). The advantage of using the client is that all your help is updated and conveniently in one place.

One advantage of using the PDF version of Help is that you look only on the app version you're using and screen all other content. A minor disadvantage is that you can't get to the Help PDF by using F1 or invoking Help > After Effects Help. Confirming that last statement is an unwieldy search task itself. In any case, it might be possible to change the preference/config file that controls the launch of Help by replacing the URL of AE Help with a local drive location, but that would take some digging (changes to AE prefs or AfterEffects_10.0.helpcfg haven't worked here).

Help is constantly being improved, so it's best to update it regularly. Todd Kopriva said awhile back that the AE Help PDF is updated "About once per month; each time the HTML version of Help on the Web is updated. I've added nearly 20 pages since October, in addition to dozens of corrections and tweaks."

For more background on Help, see previous posts AE Help clarification & survey, AE Help on the way, and more via the tag . I'd like to see more information design to help people find the easy answers. Lists and forums offer answers and recurring problems are easily solved, but answers are often hard to find. There’s a massive amount of help already out there, so it would be good if there was a database with task-based keywords that better matched groups of solutions to problems. Results could include solutions that use built-in tools, and others that provide better and/or faster solutions provided by 3rd party plug-ins and by various tutorials. Hopefully, this would also include searches or "discovery" of metadata in tutorial movies; see Adobe: 'The future of video is searchable' and other posts on metadata. The current Help is a step in this direction, but search results can still be unwieldy.

Update: more pictures (not just icons) in Help would also help making reading easier.

June 19, 2010

CS5 workflow guides for high-end cameras and formats

Todd Kopriva posted workflow guides for several high-end cameras and formats in Premiere Pro CS5 and After Effects CS5 on the Premiere Pro Training blog, for workflows with P2, RED, XDCAM, AVCCAM, and DSLR cameras and footage.

June 18, 2010

Little Planets: Pixel Bender to remap spherical panoramas

Tom Beddard has added another Pixel Bender filter to his blog subblue. In addition to his Droste Effect, Fractal Explorer, 3D Mandelbulb fractal filter, and 4D Quaternion Julia Set Ray Tracer plug-ins that work in CS4+ (After Effects and Photoshop), he's added Little Planets.

This Little Planets filter applies a stereographic projection to a spherical panorama and makes it possible to seamlessly animate from a birds-eye view in the sky to that of a bug on the ground. You can get smooth warping between the planet and tunnel views by changing the latitude offset. He also has interactive demos, and points out an older implementation, Azimuthal projections.

June 17, 2010

Puppet tool + wiggle expression in After Effects

In a new After Effects tutorial, Using the Wiggle Expression with the Puppet tool, Kert Gartner uses After Effects CS4 to look at the wiggle expression and show how it can be used with the Puppet tool to add some life to otherwise static objects. For more, see Puppet tools overview and resources and the wiggle expression reference in AE Help.

Using the Wiggle Expression with the Puppet tool from Kert Gartner on Vimeo.

June 15, 2010

GenArts releases Monsters GT for After Effects Windows

GenArts announces Monsters GT for After Effects, with over 50 effects including a variety of stylize, distort effects, fluid, trail, and particle effects. Currently only the Windows version is available (for CS5 & CS4); the Mac version should be out in Summer 2010.

There's floating point support, and the fluid simulation filters especially will benefit from GPU optimization, supported at the maximum in NVidia GeForce 200 or 400 series or Quadro 5800. Many of these are unique filters from the Flame and Smoke world, and several are very similar to other AE filters. Monsters GT was acquired in the purchase of SpeedSix, adding to GenArts stable of AE filter sets that include Sapphire, Tinder, and particleIllusion. Monsters GT features these tools:
  • Stylize effects such as CCTV, NightVision and Brush
  • Warps and distort effects such as HeatHaze, Puddle and Ripple
  • Particle effects such as Rain, Smoke and Snow
  • Fluidz, a set of plug-ins that use the power of 2d fluid dynamics to create Fire and fluid flow simulations (was in Raptors)
  • Trailz, a set of plug-ins that create a variety of smooth, particulate and stop-motion trails (was in Raptors).
Here's an overview, plus a demo of Aurora (Autodesk version):


Light Warfare + Behind the Scenes

Freddie Wong and crew are back from their recent Realistic Muzzle Flare Tutorial with the newish Light Warfare. Click on the tag AEP posts on graffiti-light graphics and After Effects tutorials.

Slight delay... looks like fun but hell no:


June 14, 2010

Adjustment Lights in After Effects

Using lights as adjustment layers lets you precisely control exposure by controlling which layers are affected by which lights. Chris and Trish Meyer have called these "Adjustment Lights" in their 2008 book Creating Motion Graphics with After Effects (see p. 281).

A few months ago Harry Frank posted a tip on using Adjustment Lights in Trapcode Particular and Lux in in the Red Giant QuickTip series. Here's Eran Stern's presentation from 2009, Adjustment Lights:


Little things in Photoshop CS5

In All the Little Things, Julieanne Kost covers all those little features in Adobe Photoshop CS5 that may get overlooked.

Behind the scenes on a Video Copilot short


Video Copilot goes behind the scenes on their recent short Payment Plan in a new "Blog Show."

Ultra Key in Premiere CS5

At AdobeTV, Tracy Peterson shows how to create clean keys quickly using the Ultra Key chroma keyer in Adobe Premiere Pro. By now Keylight in After Effects is well known and high-quality, but the Ultra Keyer may come in handy sometime even if it's not GPU-accelerated and only supports 8-bits per channel.

June 13, 2010

Automated Light Rig tutorial & preset + Particular smoke

Quba Michalski has a new After Effects tutorial and project, Tutorial+Preset: Automated Light Rig:

"Most of the time it is the best practice to manually control the lights in your After Effects scenes. There are situations however, when you may want to automate the dynamic changes in light color and intensity while maintaining high level of control over the look of your composition. That’s what the Automated Light Rig is all about.

In this tutorial I will show you how to link your lights with automated samplers on an image map, creating an ever-changing, yet unified, light rig. While the tutorial explains the expressions in depth, I am also providing you with presets simplifying the entire process into just few clicks.As a little extra, I will also show you how to create a 3D light-aware smoke using Trapcode Particular (my method is a bit more involved than the standard Particular setup, but produces results that are much more true to life)."

Will CS5 and MC5 toast FCP?

Oliver Peters has a thoughtful post on the state of editing software (with links to other recent reviews of Adobe and Avid releases) in Will CS5 and MC5 toast FCP? Here's a sample:

"It’s the ecosystem around FCP that changed it from an amateur DV editing software into a viable professional product. On the other hand, if you are working in news, then it’s more likely to be Avid than Final Cut. The main reason is the robustness of Avid’s news and shared storage solutions. Plus direct, professional support from the company, not a reseller.

In the case of Avid, Adobe and Apple, part of the business model is the suite of software that comes in the whole retail package. Avid Media Composer is typically considered as just the editing application, but in fact, the retail (boxed) version includes the Production Suite of 3rd party applications (Squeeze, BCC filters, Avid FX, Avid DVD and SmartSound). Although the emphasis is on Media Composer, this bundle offers you much of the same functionality as Apple Final Cut Studio or Adobe Production Premium CS5.

The other software is part of what people have built their businesses around. For example, design with Photoshop, build motion graphics with After Effects or Motion, color grade with Color and author with DVD Studio Pro, Encore or Avid DVD. All of these revenue streams factor into the decision of which way to go, aside from the simple choice of which editor to use. Swapping out the core platform is not a decision most owners take lightly in a challenged economy."

1000 iterations of YouTube compression

Old news in Internet time, Canzona posted a video composed of examples of 1000 iterations of YouTube compression. An homage to Alvin Lucier, "this piece explores the 'photocopy effect', where upon repeated copies the object begin to accumulate the idiosyncrasies of the medium doing the copying." (via Videomaker)

A tunnel vision effect in After Effects

Eran Stern has a new After Effects tutorial video on Artbeats, Mind Trip - Part 1:

"The first edition of this 2-part video tutorial has Eran Stern delving into the mind of a woman. Join him as he creates a tunnel vision effect by applying a few After Effects tricks such as time remapping, motion blur, blending, and color correction to footage from Artbeats.com. This cool technique can be used on it's own or in conjunction with Part 2 (coming soon)."

Update: Mind Trip - Part 2. Plus Eran has a Stylized tunnel using AE Shape, Cylinder, & Color Link and there's 28. The Tunnel from MaxAfter.

Also, a short test by Gabriel Mathews shows that Trapcode Form is an option.

EXR Channels and Post DOF/Mblur in After Effects

Chad Ashley of cgpov posted a new After Effects tutorial, EXR Channels and Post DOF/Mblur, which covers generating depth of field and motion blur from 3D renders of EXR files using AE filter packs fnord ProEXR (built into AE), Frischluft Lenscare, RE:Vision ReelSmart Motion Blur, and more.

Similar tutorials can be found in Adding motion blur to video or 3D renders. There's more info and tutorials on Importing and using 3D files and 3D Channel effects in AE Help, and more generally on the 3D-AE nexus from Motionworks, Tim Clapham, Greyscale Gorilla, CGtuts, VFX Haiku, and in Topher Welsh uber-roundups. Here's Chad's tutorial:

3D Post DOF and Motion Blur in After Effects from chad smashley on Vimeo.

June 12, 2010

Unplugged 26: Sapphire, MonstersGT, ParticleIllusion, and goodbye to Tinder for After Effects

Motionworks' Unplugged 26 features an interview with Steve Bannerman of GenArts:

"For over a decade GenArts had a single product – Sapphire – plug-ins for high end systems such as Flame, and in more recent times, After Effects. Recently GenArts has begun to diversify, acquiring Monsters GT from Speed Six, Tinder from The Foundry, and Particle Illusion from Wondertouch. In this candid episode I discuss each of these products with GenArts' Steve Bannerman."

June 11, 2010

Fringe-style floating titles, 3D box shot, & Corner Pinning with Mocha for CS5

Laurence Grayson posted After Effects Tutorial - 3D floating titles, Fringe-style, in 2 parts using the $99 PF Hoe. He notes that "a 3D planar tracker is NOT the same as a 3D camera tracker." (via)

He has several additional After Effects tutorials on YouTube, including Glamming up a 2D box shot and Corner Pinning with Mocha for CS5. Here's the 3D camera tracking tutorial:


June 8, 2010

SIGGRAPH 2010 papers & previews

ACM SIGGRAPH 2010 is being held July 25-29 in Los Angeles. There's a list of technical papers on the site, along with a media news blog and YouTube channel with extra videos.

Ke-Sen Huang keeps a list of SIGGRAPH papers with links to the projects (and an icon if video is available).


Note: last year's crop was noted in SIGGRAPH 2009 Technical Papers Video Preview and SIGGRAPH 2009 papers & projects online.

Automated flashing lights patterns in After Effects


Red Giant TV has a new After Effects tutorial by Chris Zwar. In Episode 45: Creating Automated Flashing Light Patterns, Chris revisits his After Effects 3D "Centrica" project to show you how he set up the automated flashing lights patterns with expressions and lens flares (he used Knoll Spectacular; Video Copilot should work too).

Chris has a number of interesting other articles and projects at Creative Cow and his own website, and broadly covered his "Centrica" project for PVC last year. Todd Kopriva fleshed out a nice overview in Chris Zwar on planning and creating a complex 3D project.

Lightroom 3 released

Adobe Lightroom 3 has been released; see details at Lightroom Journal and John Nack's blog.

There are a number of podcasts and other resources available through Adobe Education Technologies, and a series of in-depth tutorials by Julieanne Kost, Getting Started with Adobe Photoshop Lightroom 3. Here's the intro:


Update: Peachpit has a big Welcome to Lightroom 3, with many videos from Rafael "RC" Concepcion.

June 7, 2010

3D Widgets: scripts for AE 3D space navigation

AE Scripts has a new set of scripts by Ben Rollason, 3D Widgets, to make navigating the After Effects 3D space more intuitive.


Note: AE Scripts also has a number of other useful scripts for 3D in AE. Rollason prevously released Skydome , a script for After Effects that "creates a 3D environment for your After Effects compositions at the touch of a button. The environment then responds to your camera’s position, orientation, rotation and lens properties." Here's the introduction:

Reminder on Auto-trace in After Effects

Justin Young posted a quick tip on using Auto-trace in After Effects to help speed up mask creation (via), as seen in the RGTV tutorial Stitching effect with Particular in After Effects.


Note: See also 'Super tight' garbage mattes in After Effects for a technique explained by Aharon Rabinowitz which used Auto-Trace and the Simple Choker to refine garbage mattes.

June 6, 2010

After Effects expressions: Time, Layer Numbers, Speed, and Velocity

Chris and Trish Meyer posted the 6th of the 12-part series Deeper Modes of Expression, based on an extra in their book Creating Motion Graphics with After Effects. The 6th installment is Deeper Modes of Expression, Part 6: Managing Time, Layer Numbers, Speed, and Velocity:

"By default, expressions assume you are interested in values at the current time. If you need to know the current time, just use the keyword time in an expression, and After Effects will return the current time in seconds (not frames, as we discussed in the previous section).

However, expressions allow you to access values at different points in time. They also let you find out what time keyframes and markers are located at so you can have animations change as they approach or cross one of these keys, as well as reference what other layers are doing. In this installment, we’ll explore a couple of ways to exploit time. ...including having one layer echo the movements of another with delay."

'100% Accurate Reflections'

In a new After Effects tutorial and project, 100% Accurate Reflections Tutorial, Quba Michalski demonstrates "how to build a two-camera rig in order to create perfect 3D reflections. using this technique, you will be able to reflect not only 3D layers, but also lights, particles, as well as any plug-in that obeys the movement of AE's 3D camera.

The setup is trivially easy when using hand-animated cameras, but in the second half of the video I also show you how to create a more complex rig for use with Video Copilot’s Sure Target 2 camera controls."


You can also create reflections with 3rd party AE filters like RGS Warp, Zaxwerks Reflector or the free VC Reflect filter -- and through a variety of other tutorials via the tag . Here's Quba's preview:


Update: Rob Garrott shows Two ways to create a reflective floor in After Effects,